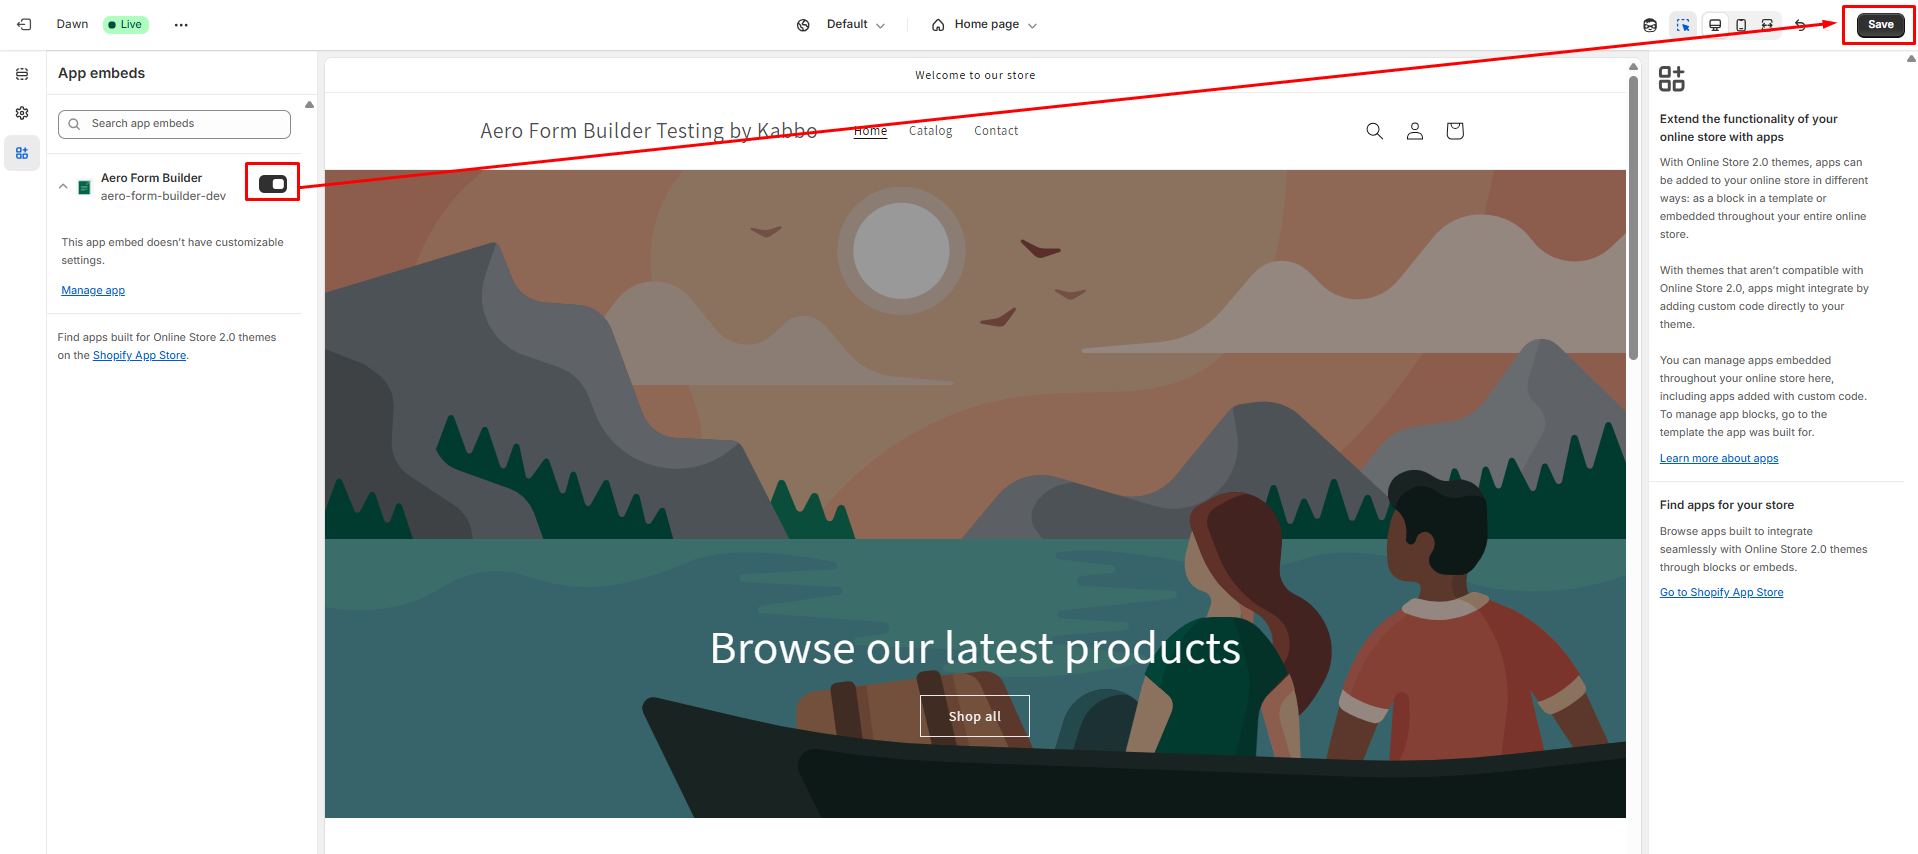
Save 65% on express or express production until 21th September

Guide to Use Aero Form Builder

Step 1: Go to Shopify App Store

Step 2: Search Aero Form Builder

Step 3: Install Aero Form Builder in your Store

Step 4: Go to the theme customization menu and embed our app by enabling the toggle button and click on save button to install the app on the theme.

Picture1

Step 5: Go to your Store and Select Apps Option

Picture2

Step 6: Select Aero Form Builder

Picture4

Step 7: To create new form go to Dashboard and select New Form

Picture5

Step 8: To create new form you have to enter form name this is required field

Picture6

Step 9: To add Header on your form select Header

Picture7

Step 10: To add element to your form select add element

Picture8

Step 11: User can add options as user’s requirements.

Picture9

Step 12: Users can edit elements to customize fields. For Input Field you can customize field size and also there is a preview window to observe.

Picture10

Step 13: You can customize the desktop view as well as mobile view by clicking on desktop and mobile icon.

Picture11

Step 14: There is a preview option for Desktop and Mobile

Picture12
Picture13

Step 15: After adding an element, set the form name and click the Save button. Then, select the page location where the form will appear.

Picture14

Step 16: After saving, the form will appear in your form list.

Picture15

Step 17: You can edit the form anytime by clicking the Edit button.

Picture16

Step 18: You can delete the form by clicking delete button.

Picture17

Step 19: You can activate or deactivate the form by clicking this button.

Picture18

Step 20: Click here to go directly to the Theme Embeds section. You will be redirected to the page section where you previously set the form.

Picture19

Step 21: Then In the themes embeds section, you have to click Add section or Add block button according to your desired location.

Picture20

Step 22: Then Select the apps “Aero Form Builder” from the Apps section.

Picture21

Step 23: Then the Forms will be appear here which form you created earlier. Then you have to click Save Button.

Picture22

Step 24: If user want to create custom pages , user have to click here

Picture23

Step 25: The user must fill in the Page Title and Page URL Name, then click the "Create Page" button.

Picture24

Step 26: This will create the page.

Picture25

Step 27: You can found this page in the page section.

Picture26

Step 28: Users can add this page directly to the storefront's navigation menu by selecting "Add to Navigation Menu" and clicking the "Add to Navigation Menu" button.
Note: If "Add to Navigation Menu" is not selected, you will need to manually enter the page link.

Picture27

Step 29: In the storefront, you will see the Product List page along with the page creation link you previously added.

Picture28

Conditional Logic

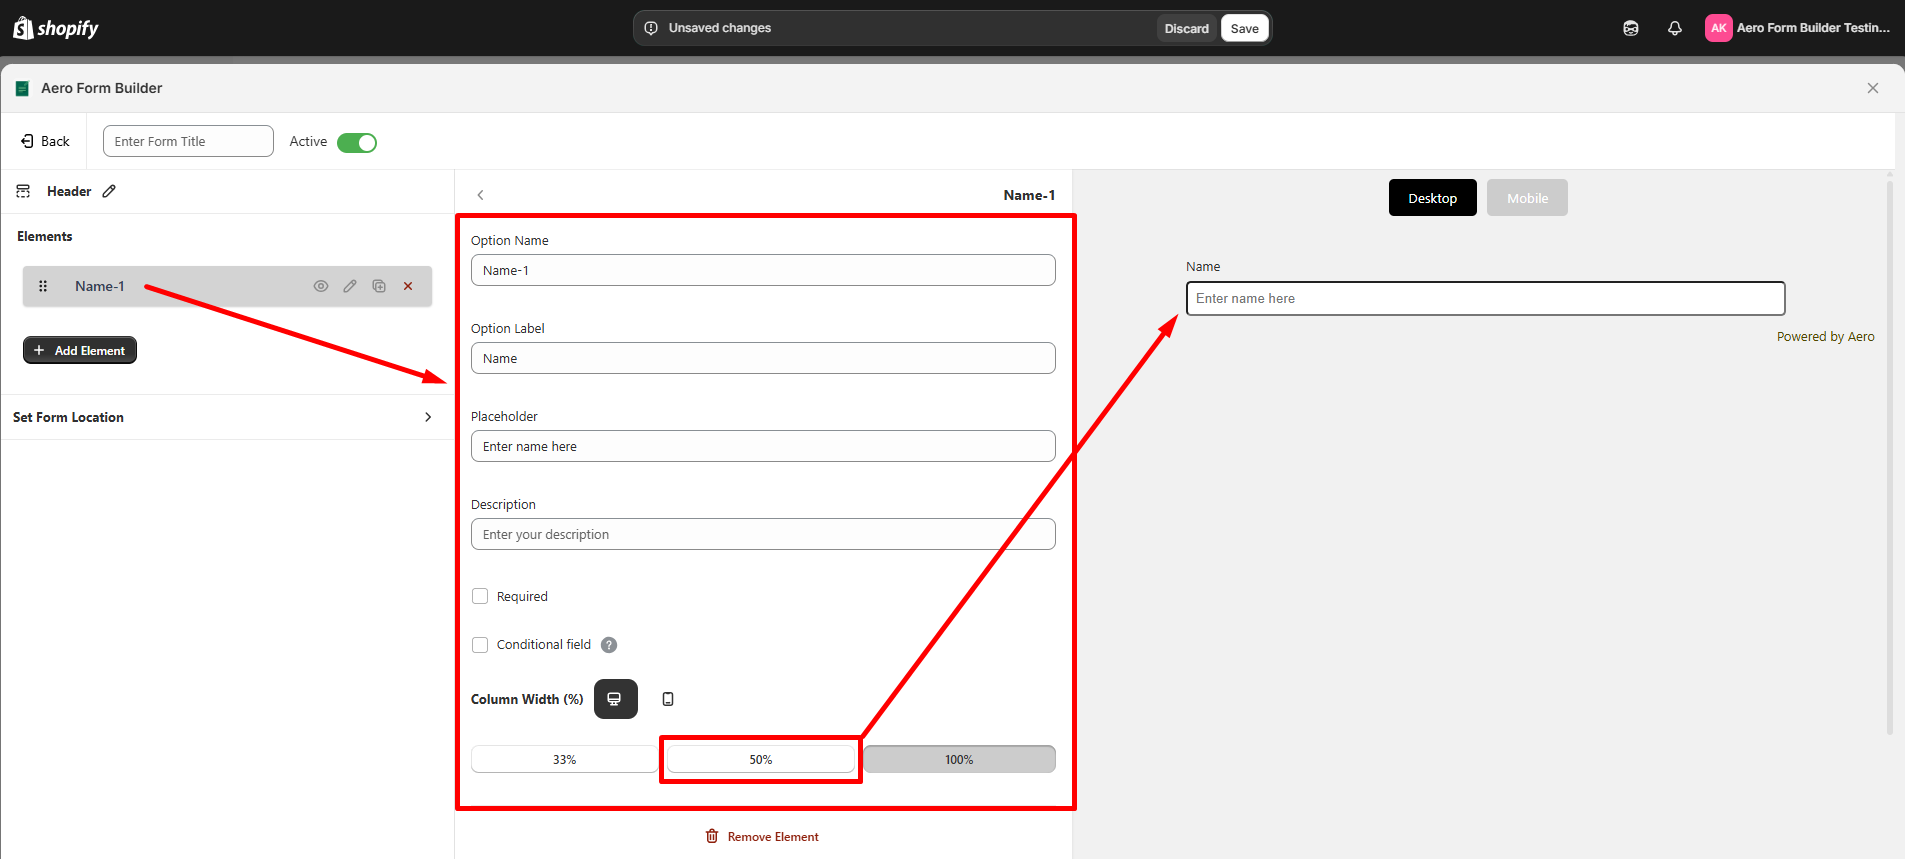
Step 30: Users can use conditional logic if they want to apply conditional logic.

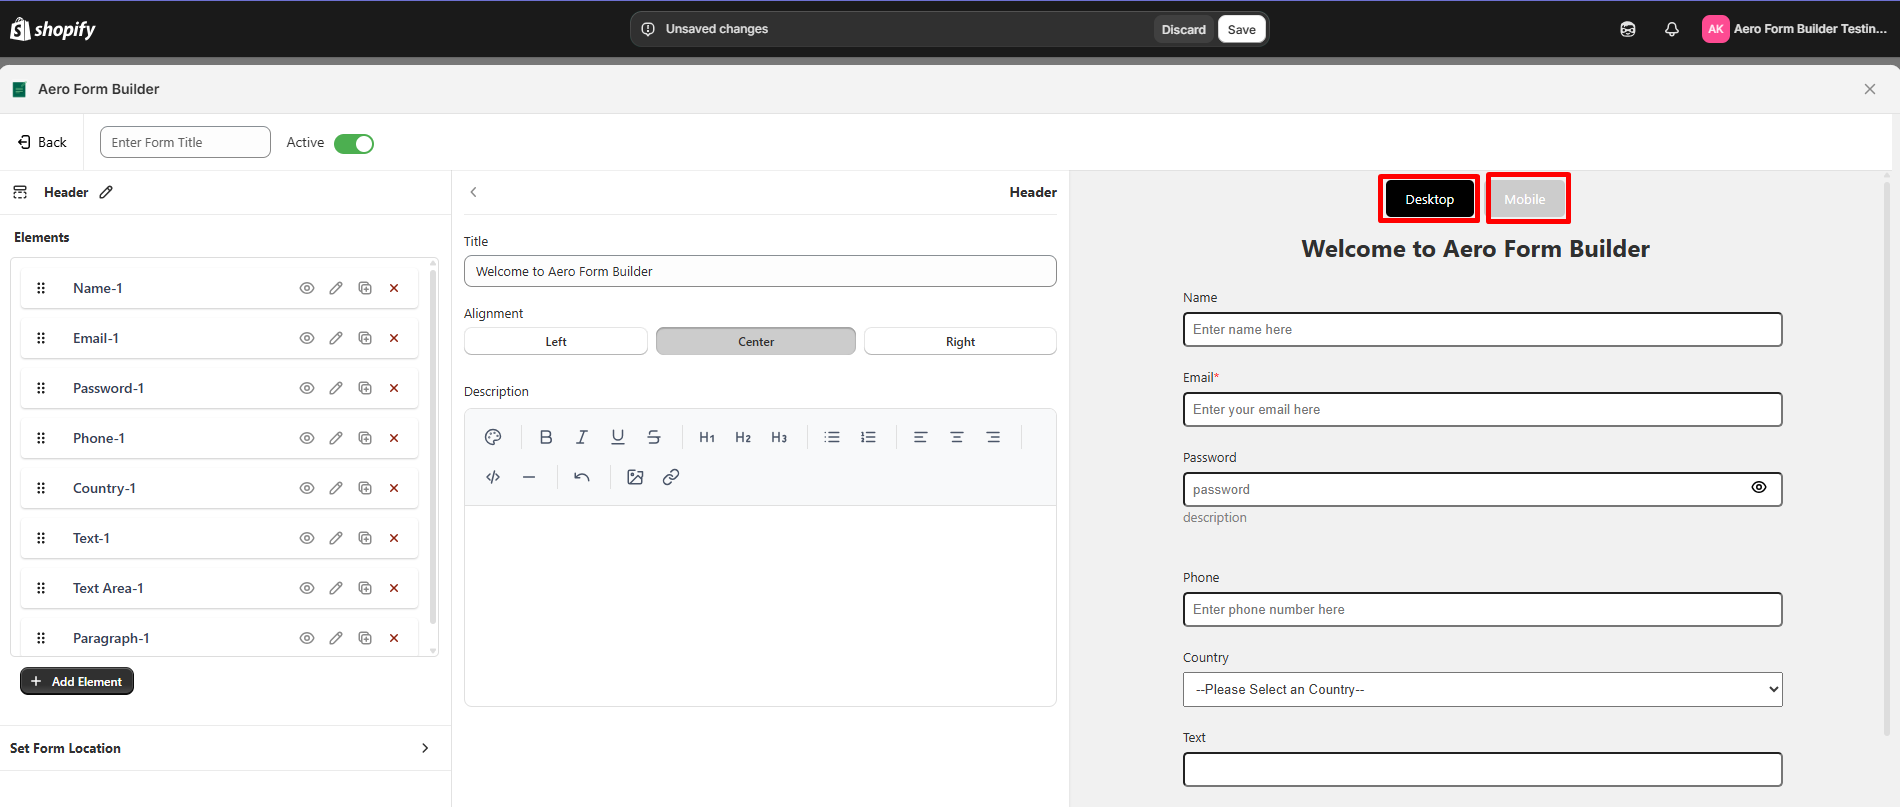
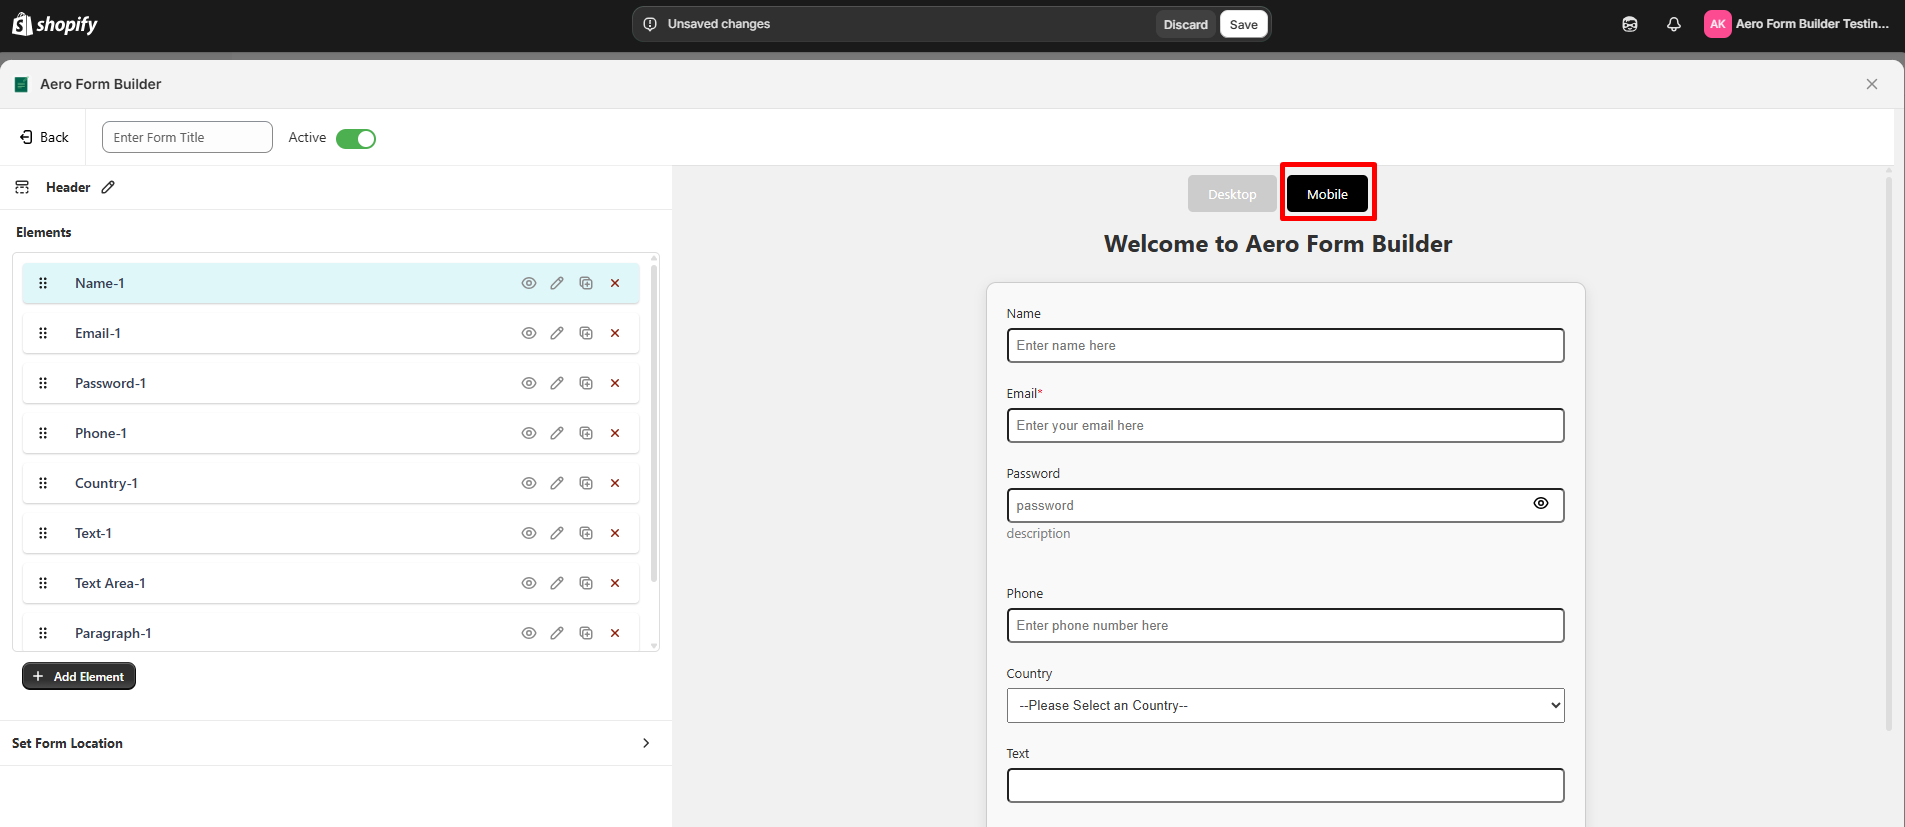
This app allows users to apply conditional logic to form elements, making fields visible only when specific conditions are met.

How Conditional Logic Works

Conditional logic ensures that a particular field is displayed only when a selected parent field meets a specified condition.

The form builder offers various fields that can be used as parent conditions, such as:

  • Email • Phone • Country • Text • Text Area • URL • Number • Quantity • Dropdown • Checkbox • Radio Button • Button • Switch • Accept Terms • Rating

Each of these fields can be set as a parent field, meaning their value determines whether another field (like Name) will be displayed.

Step-by-Step Working Principle

1. Select the Field to Apply Conditional Logic

  • Click the Editbutton of the field you want to control (e.g., Name).
Picture29

2. Enable Conditional Logic

  • Check the Conditional Field
Picture30

3. Choose a Parent Field

  • Select a field from the “Only show element if…”
  • For example, select Emailif you want the Name field to depend on it.
Picture31

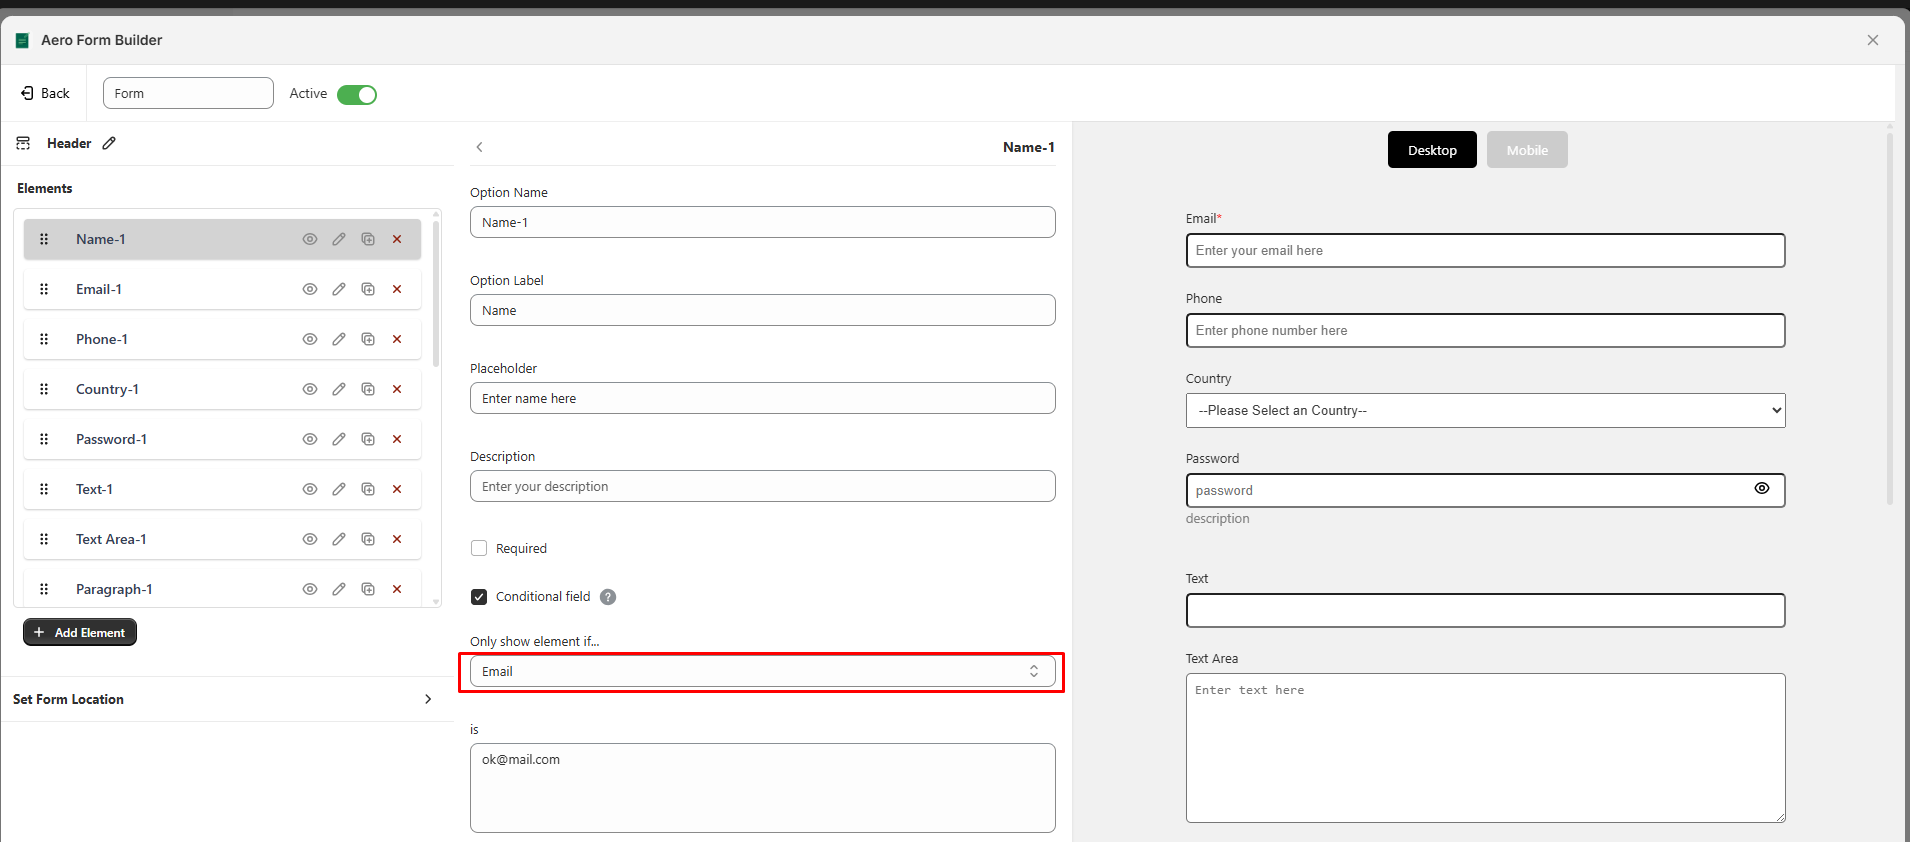
4. Define the Condition

  • Set the value that the parent field must match for the target field to appear.
  • Example: Email = “ok@mail.com”→ The Name field will only be shown when the Email field contains “ok@mail.com”.
Picture32

Apply Conditional Logic to Other Fields

  • The same process can be applied to other fields, using different conditions.
  • Example: Show a Phonefield only when a Country field is set to “USA”.


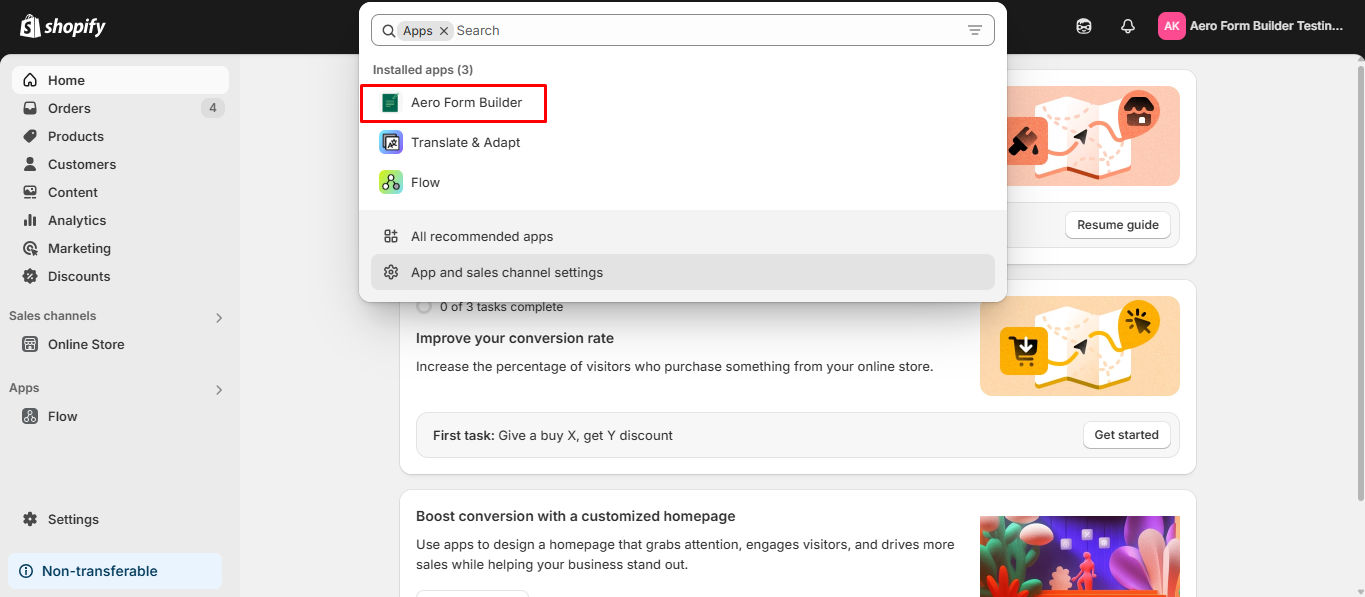
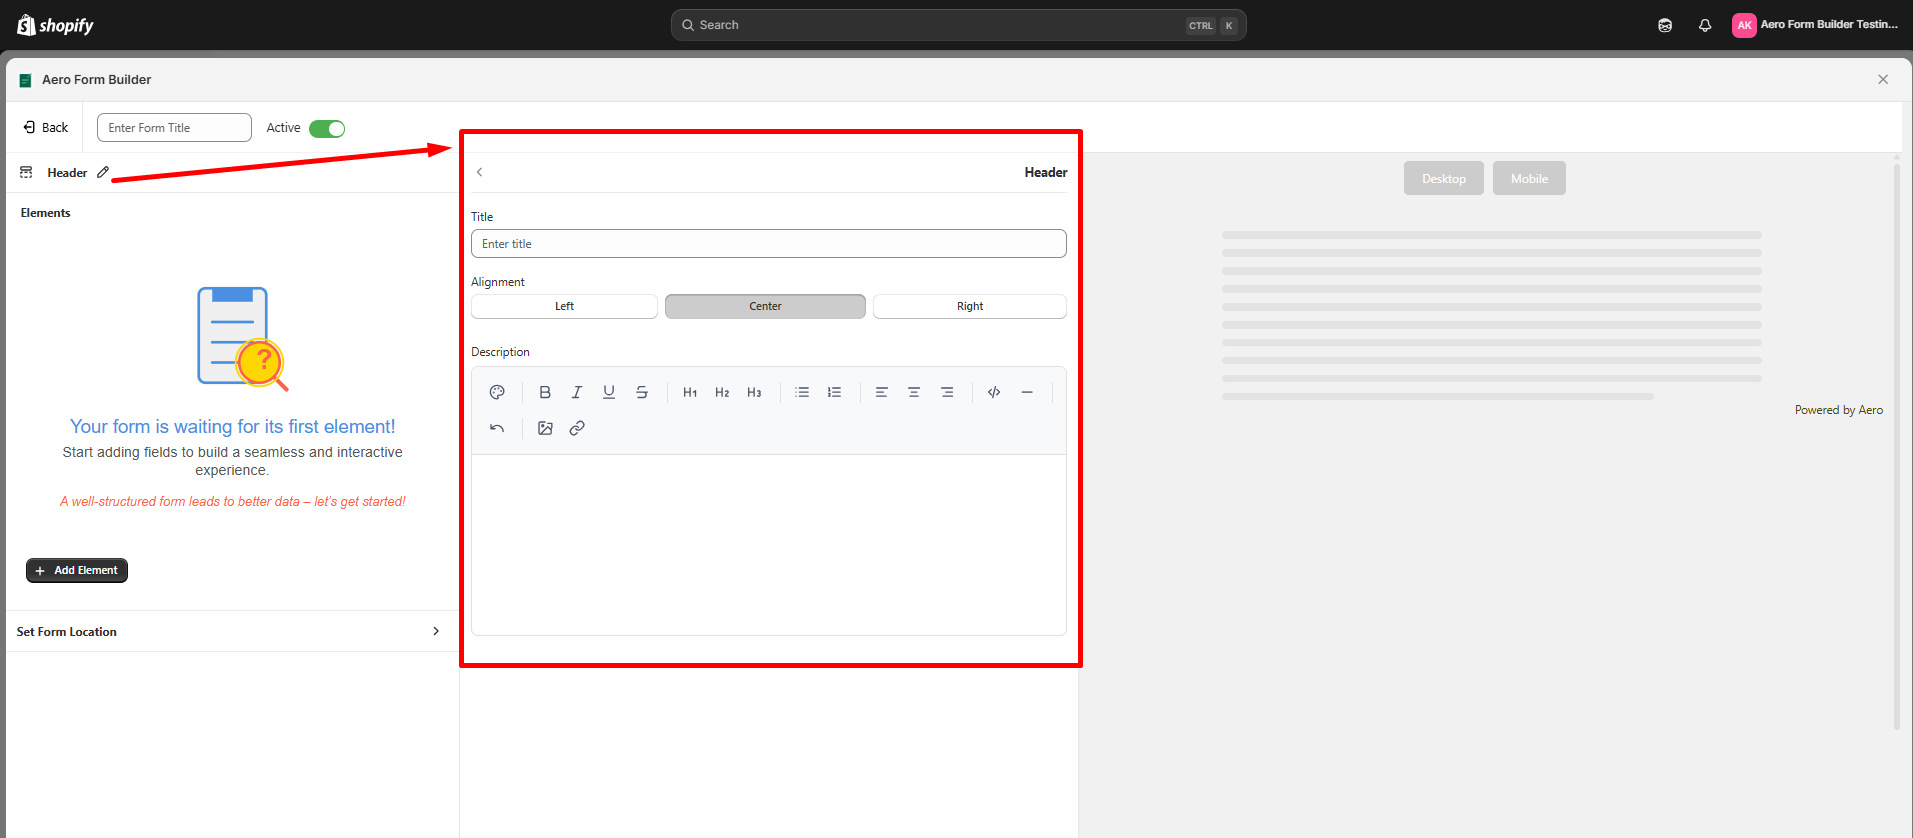
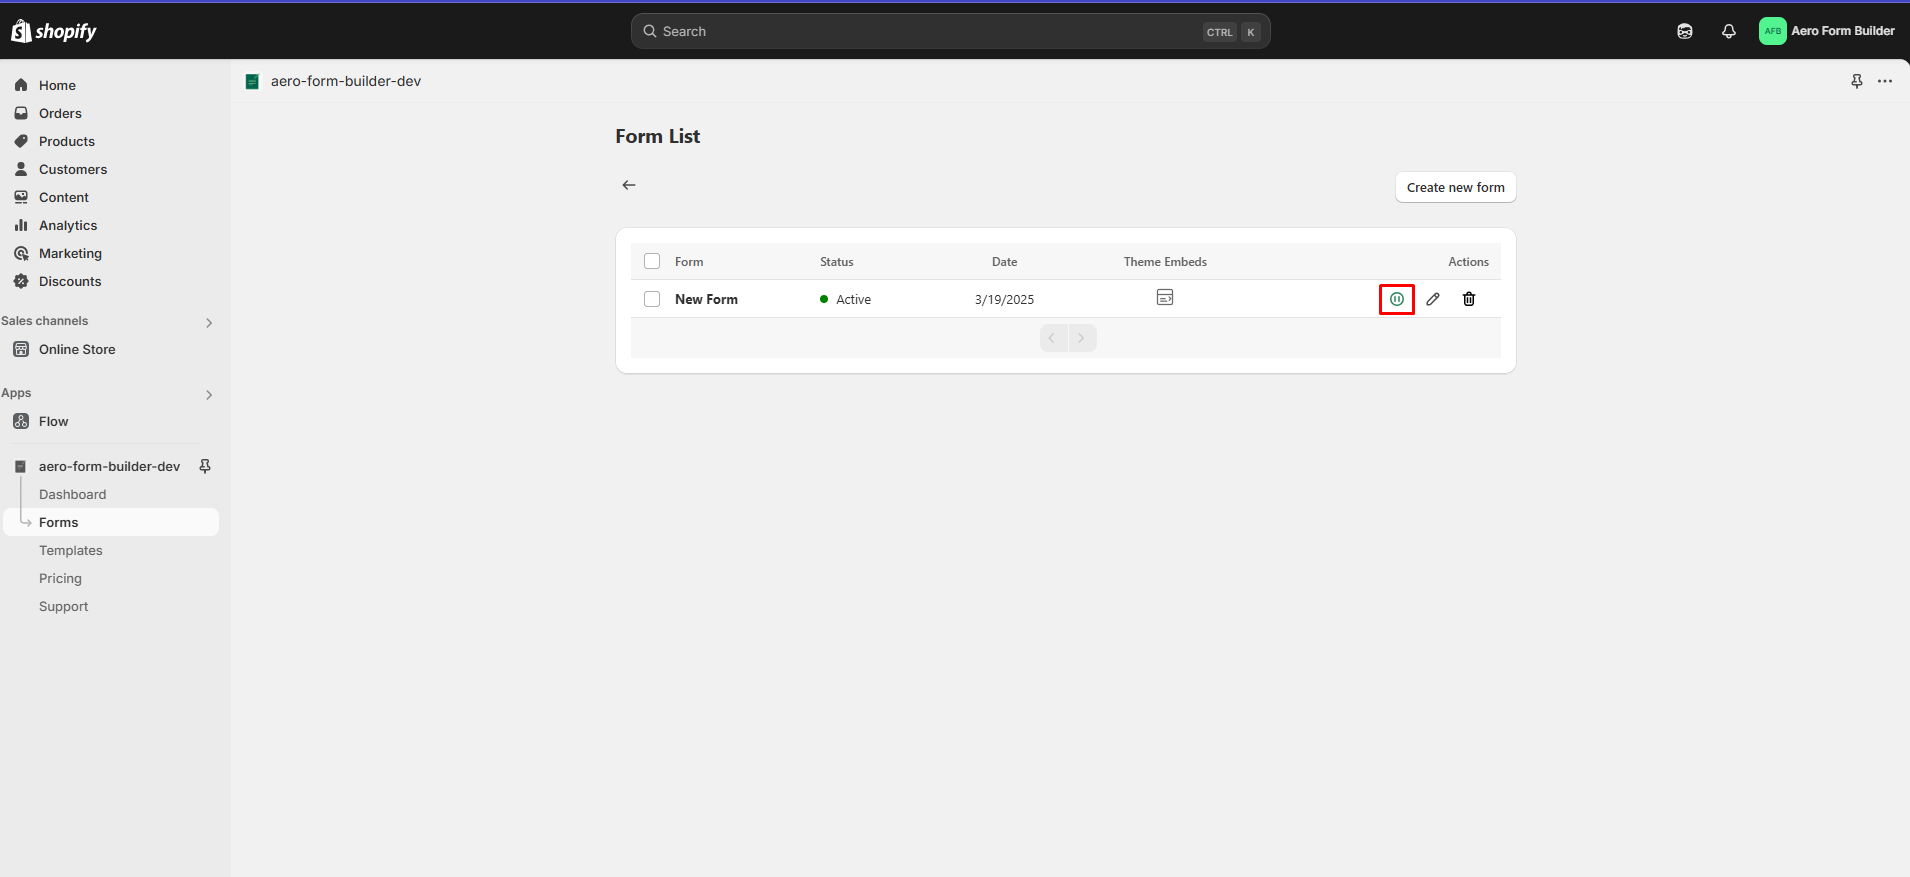
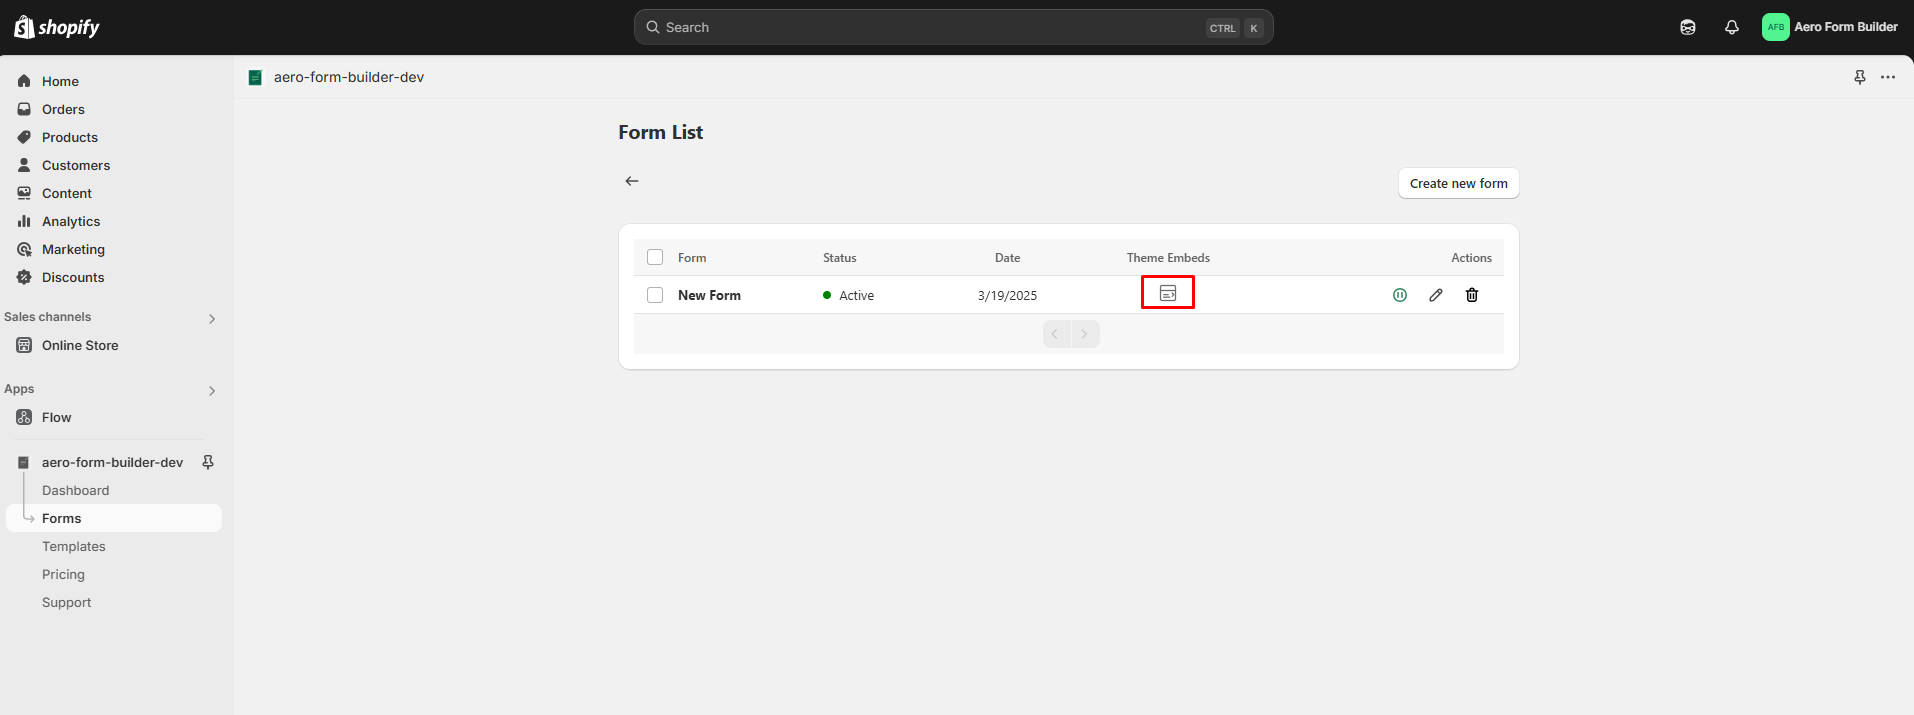
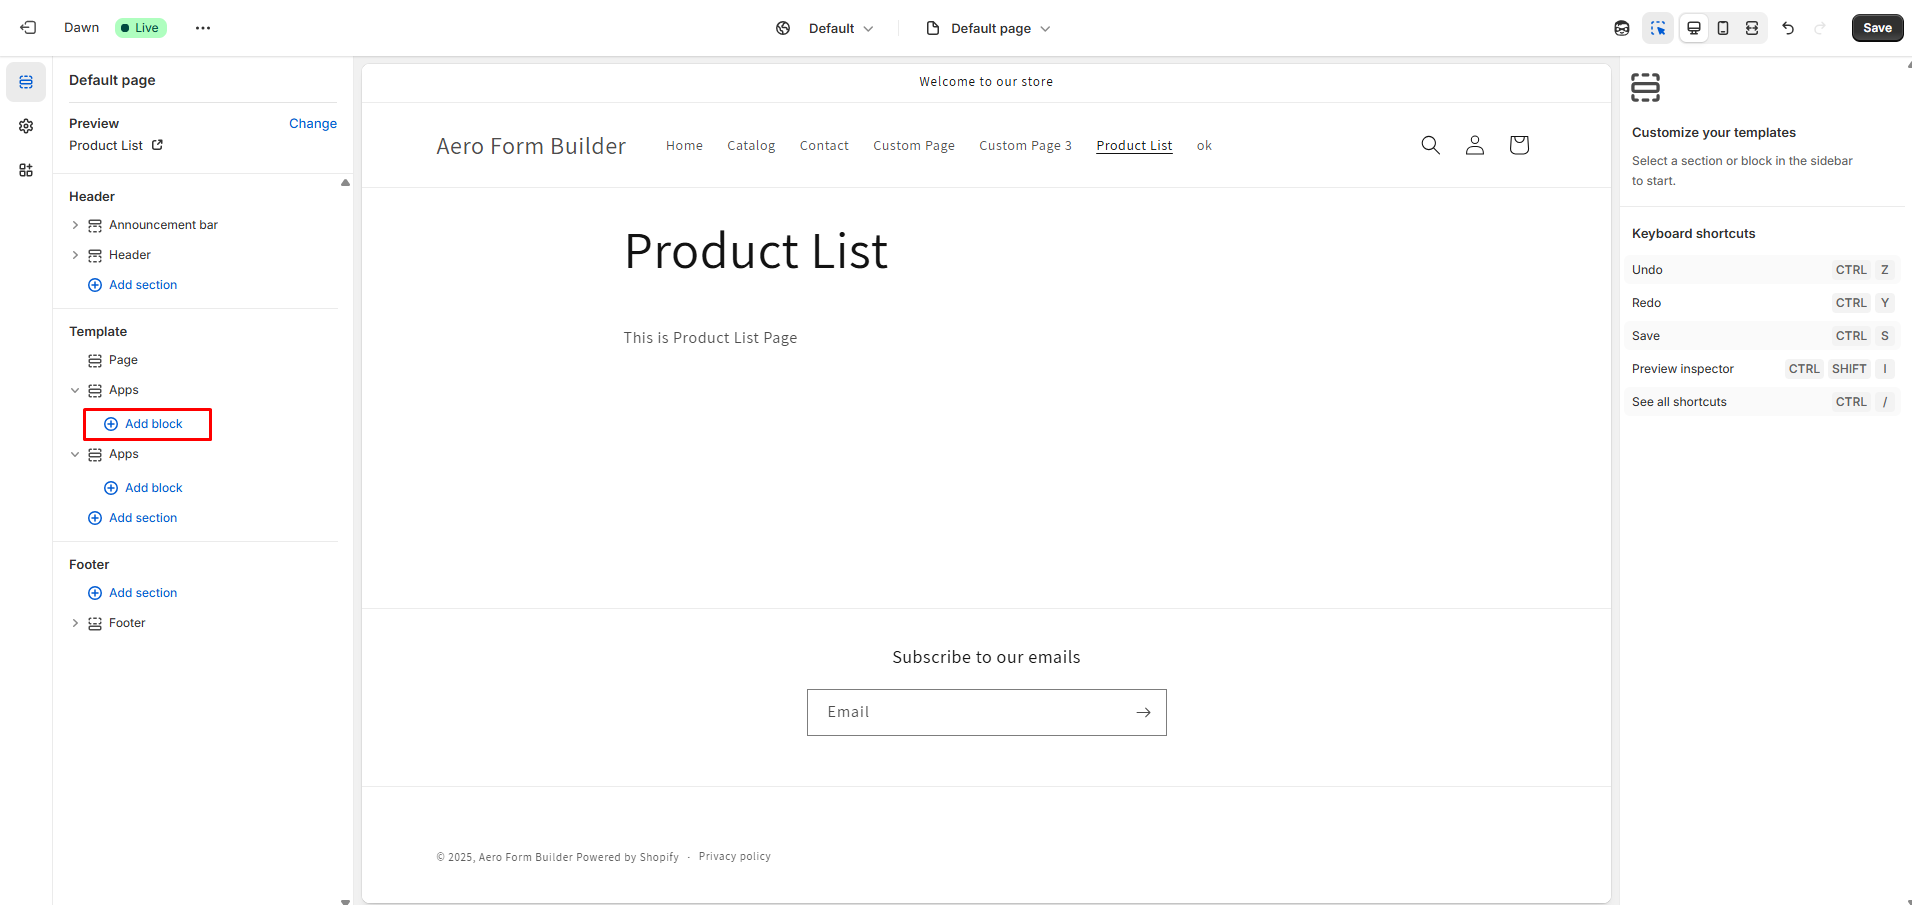
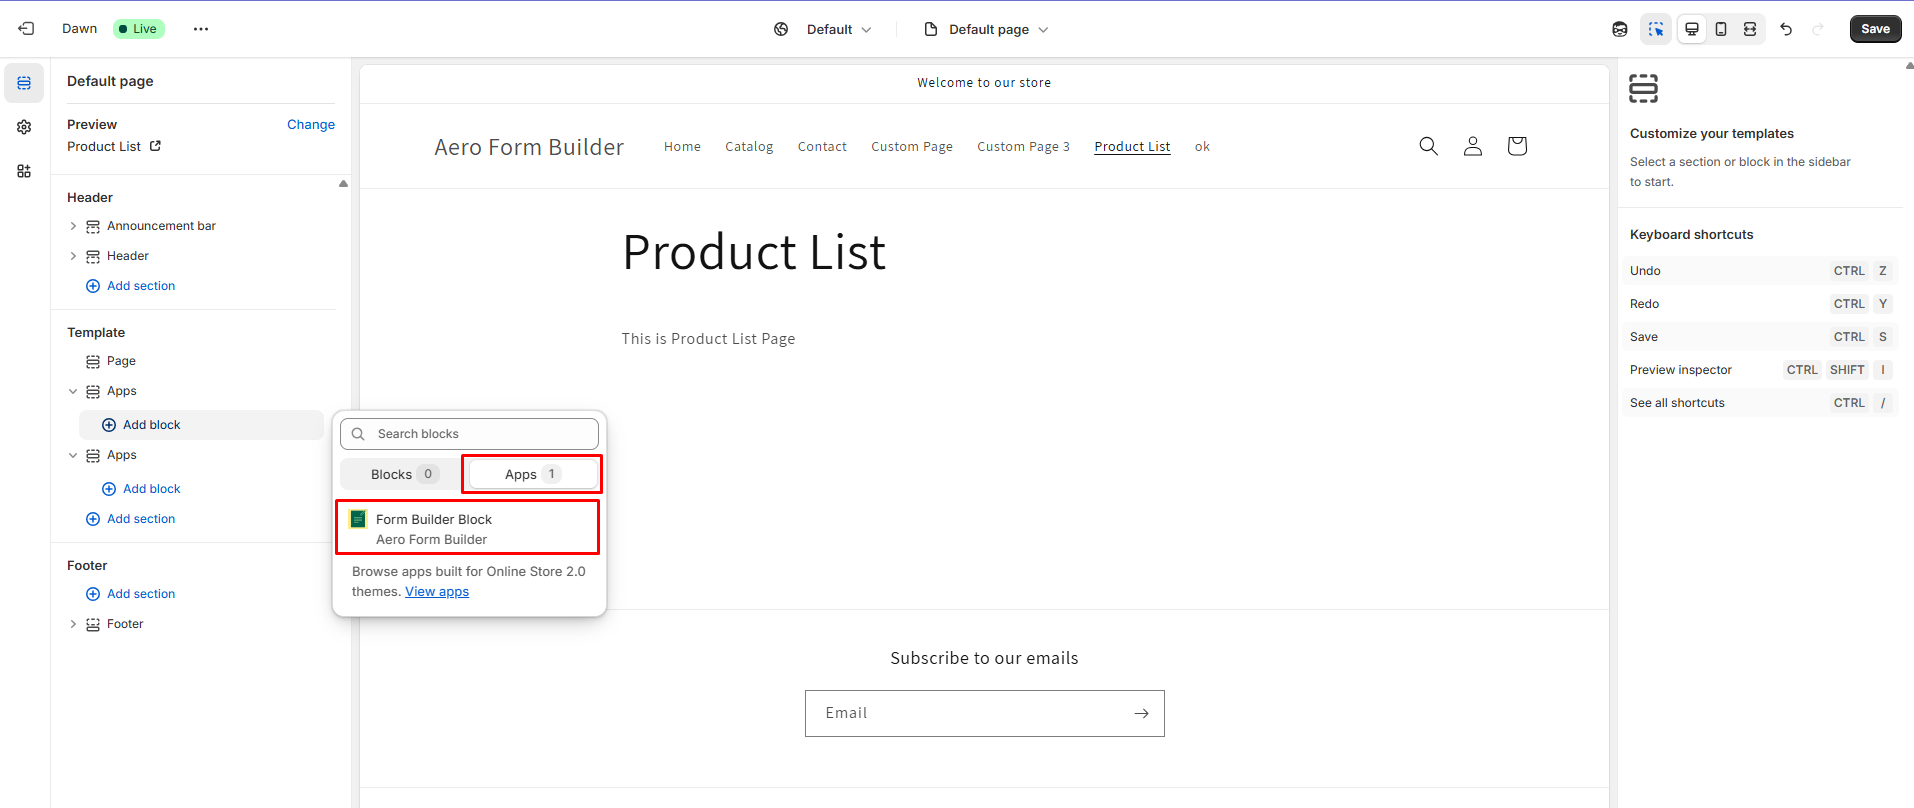
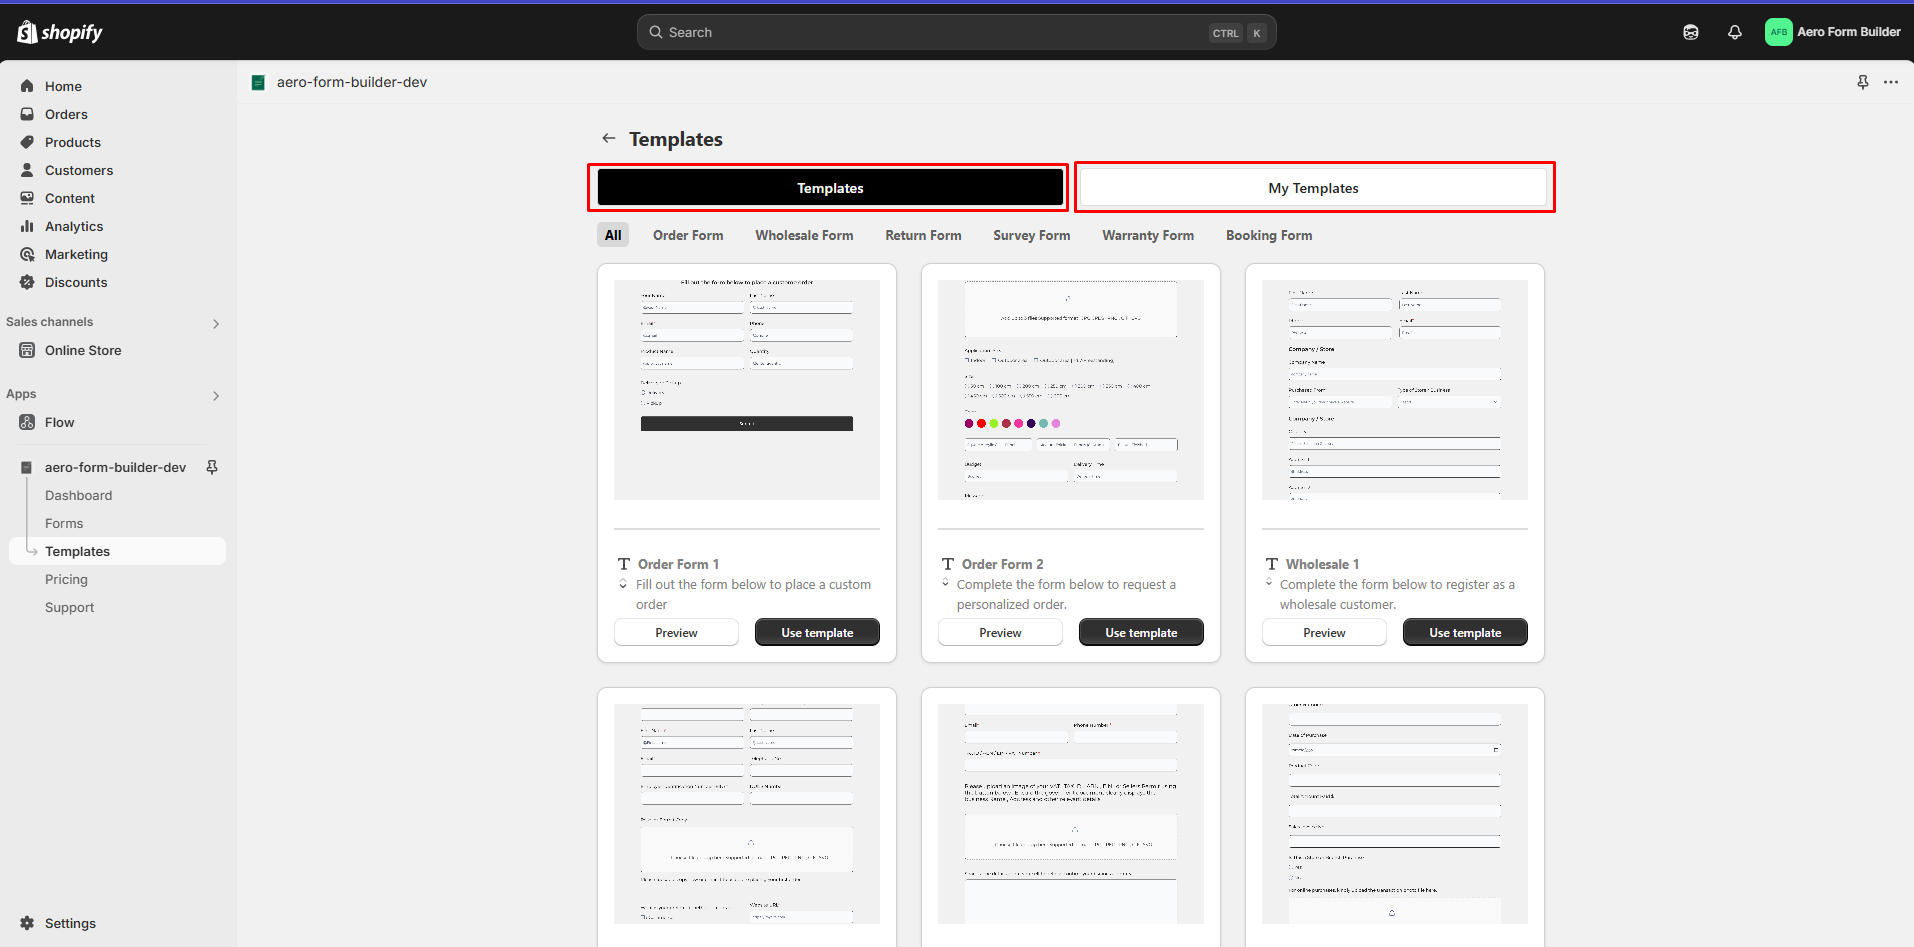
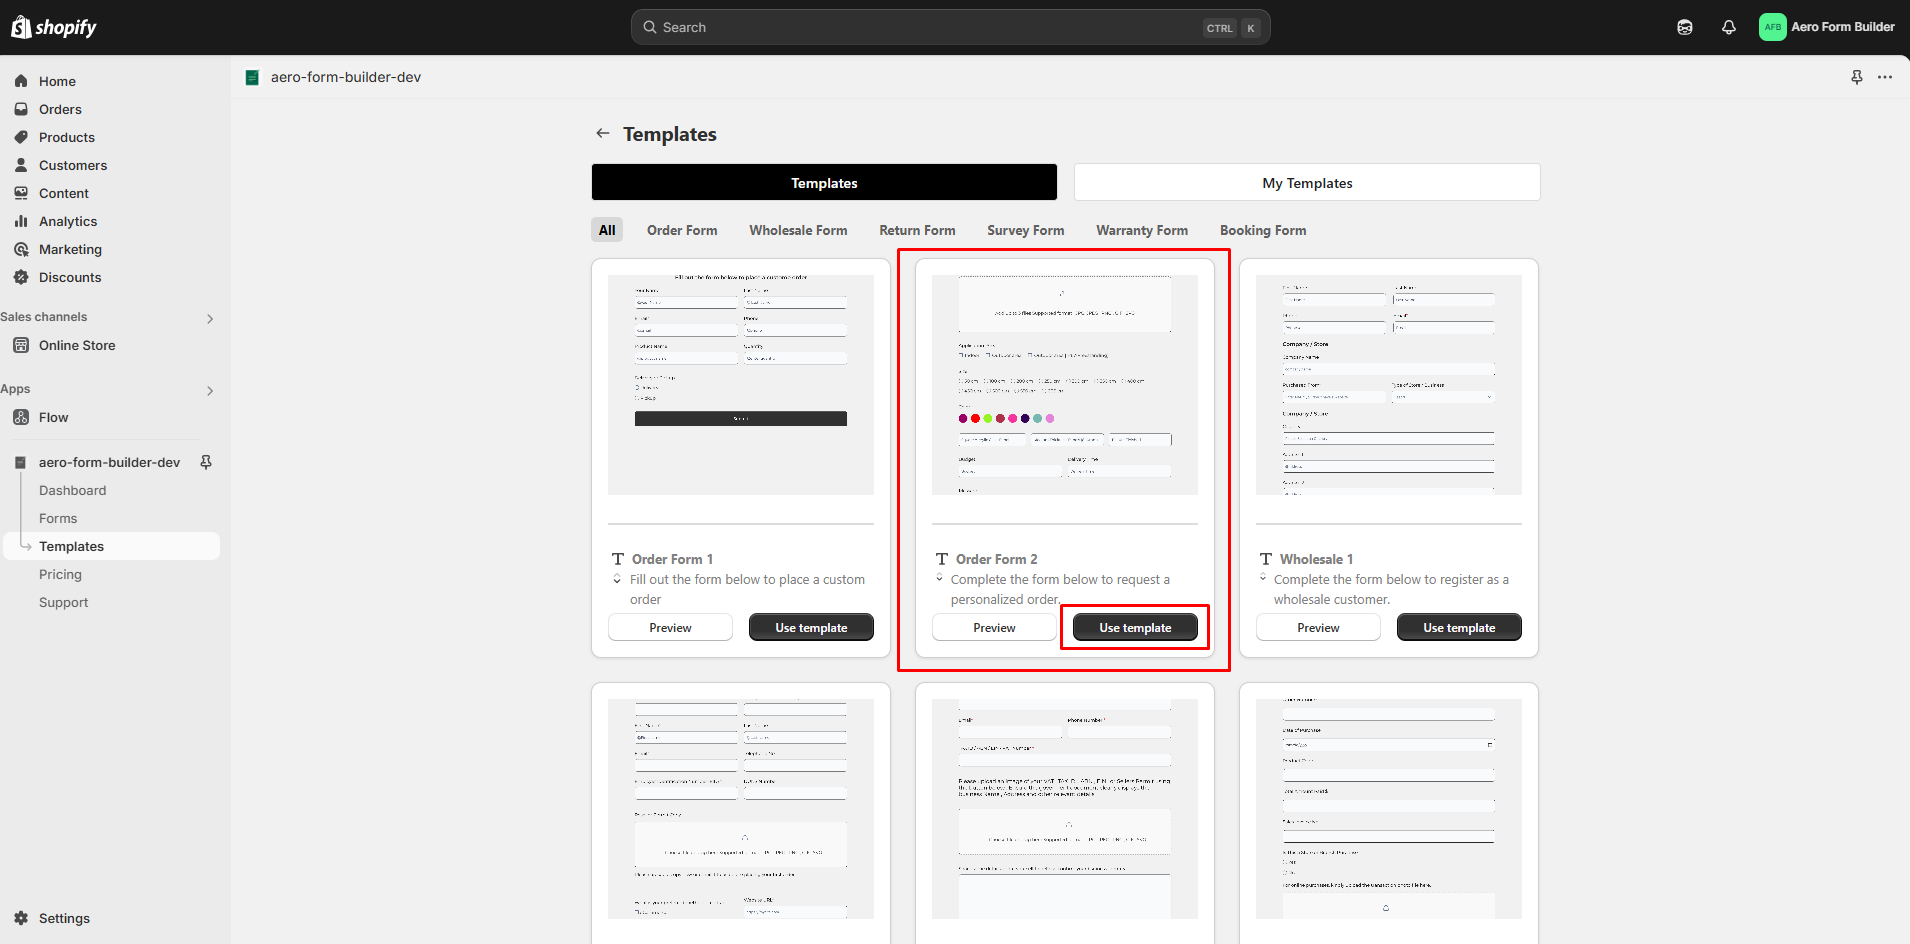
Step 31: Users can use or edit pre-designed templates based on their needs. There are two template sections.

Picture33

Step 32: In the Templates section, you can view all custom templates, edit them, and use them as needed.

Picture34

Step 33: Select any Templates by clicking “Use Template” button.

Picture35

Step 34: After that, you can use these templates and add elements by clicking the “Add Element” button. You can also edit any section as needed.

Picture36

Step 35: Then you have to choose page location where you want set this form.

Picture37

Step 36: After that you have to click Save button.

Picture38

Step 37: Then you can see that form is created in your Form List.

Picture39

Step 38: In the My Templates section, you can save Templates.

Picture40