
Aero SEO Rank AI
User Guidance Of Aero Seo Rank AI
Step 1: Go to Shopify App Store
Step 2: Search Aero Seo Rank AI
Step 3: Install Aero Seo Rank AI in your Store
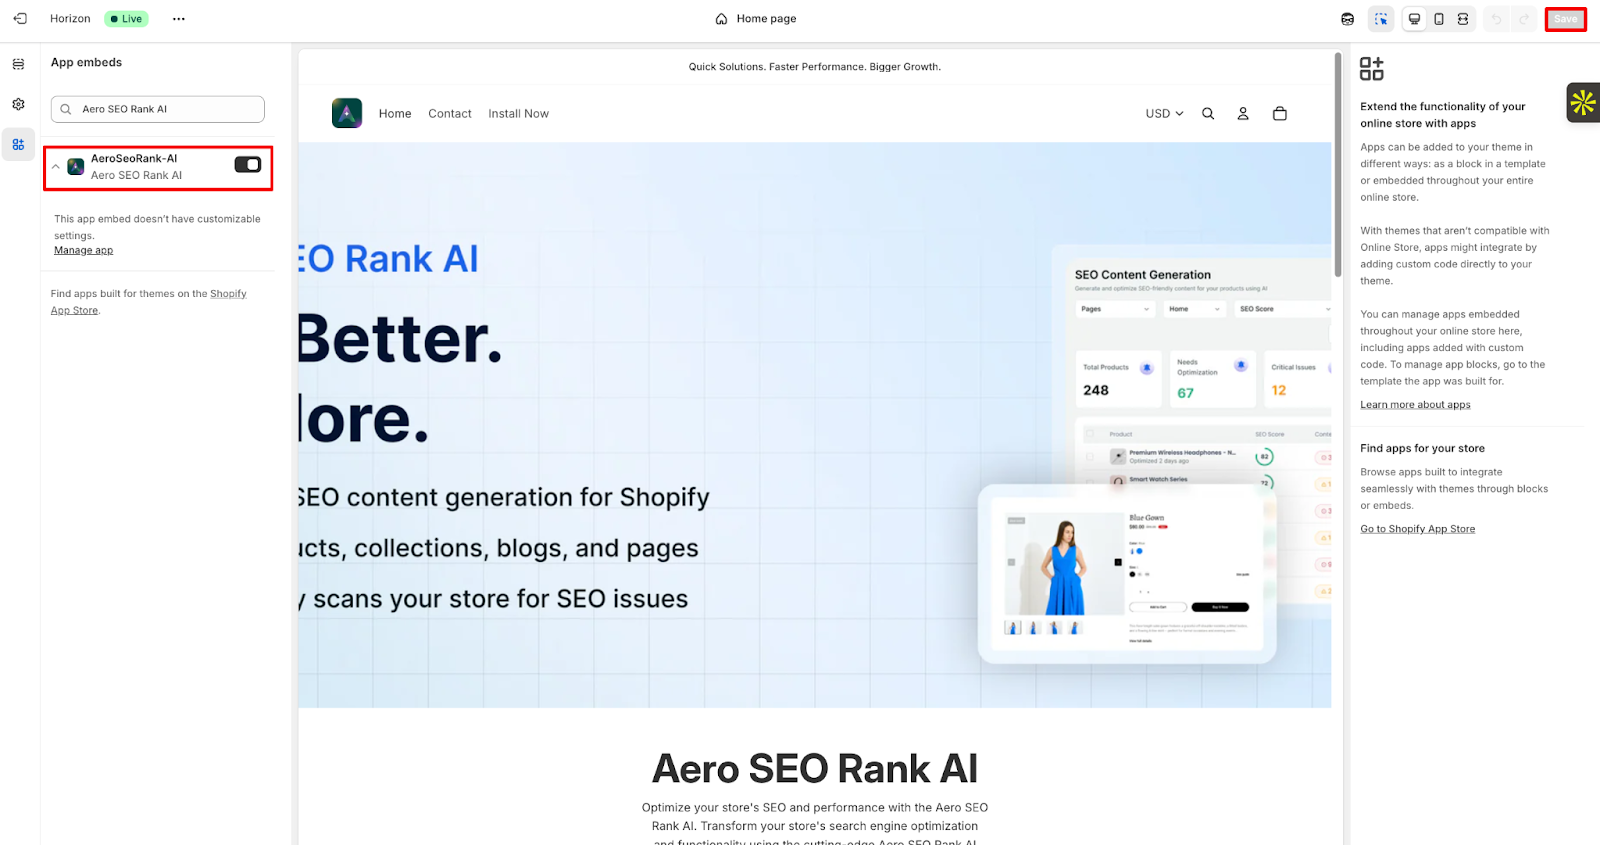
Step 4: After Installation Enable the app from the dashboard
Step 5: In the theme customization menu, enable the toggle button to embed our app, and then click the save button to install the app.
Step 6: Click on the reload Dashboard to see the setup progress
Step 7: To optimize content generation, go to Dashboard and select Optimize.
Step 9: Users can search for products and also sort the products according to filters such as –
- Title A-Z
- Title Z-A
- SEO score high to low
- SEO score low to high

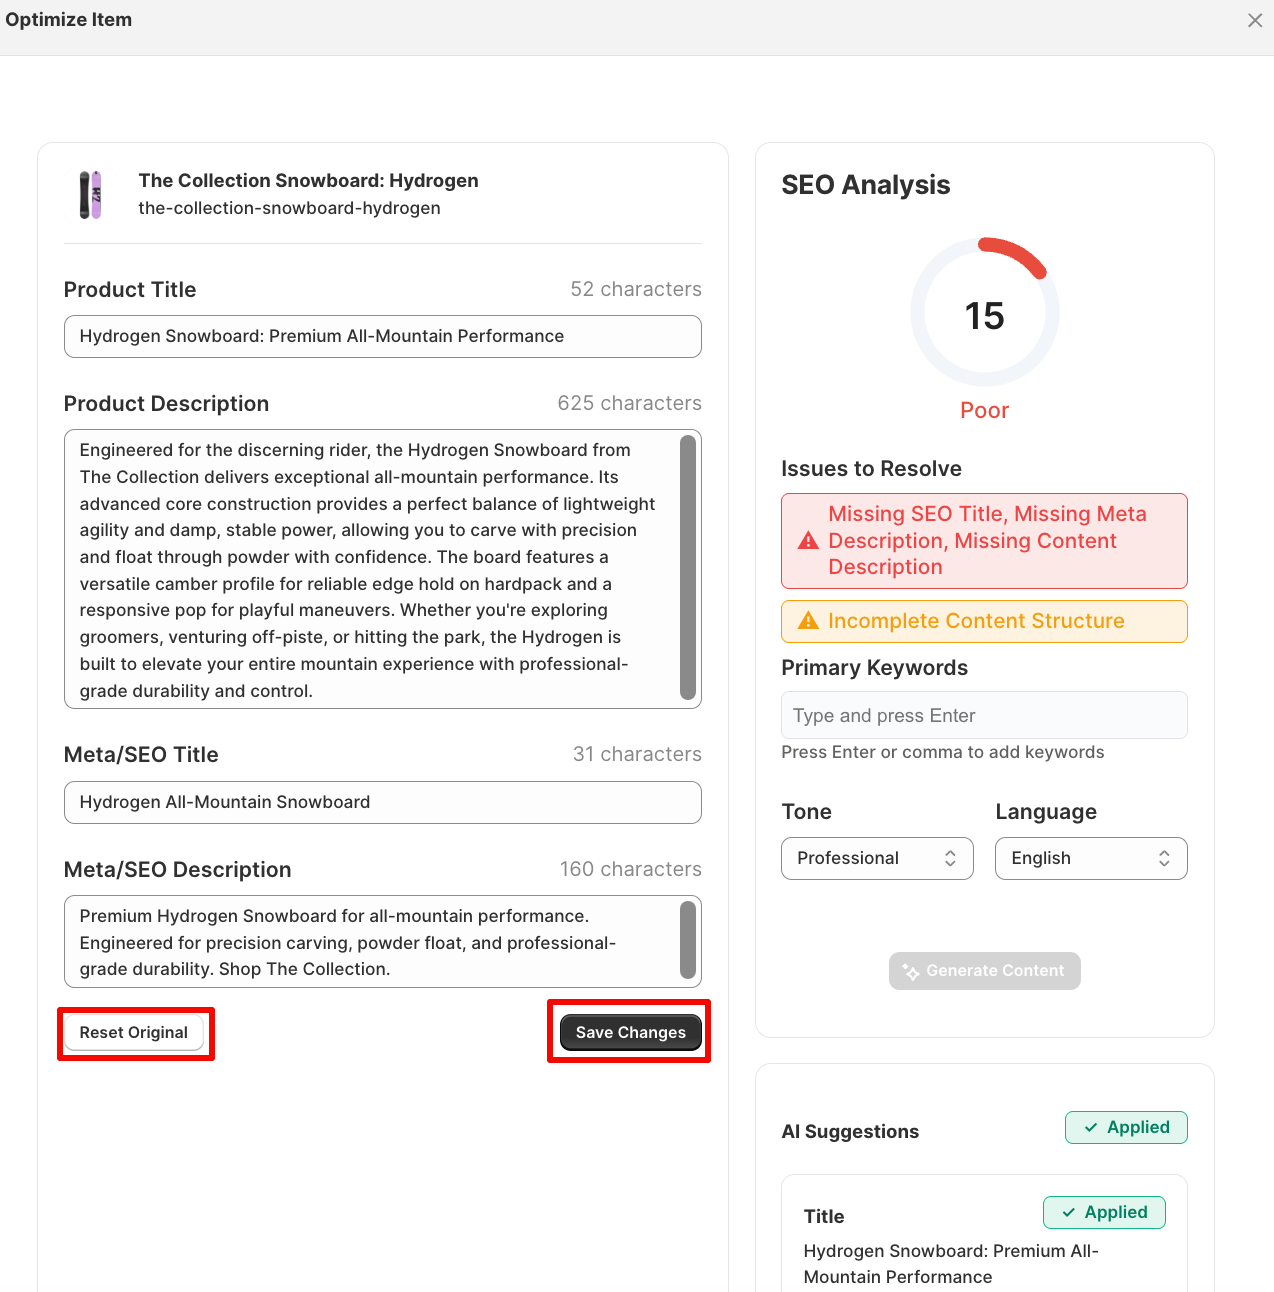
Step 15: After clicking on the “Details” button, users will be redirected to the overview tab of SEO Audit Results. There are other tabs named SEO, Performance, Accessibility, and Best Practices for displaying the issues on those specific aspects. In the SEO Audit, we have an overview tab where we can see the total SEO score, issues, and passed checks. Users can run a new audit scan by clicking on the Run new scan button. They can also view the issues. There is an “Optimize Content” button that the users can click to optimize content
Step 16: In the SEO tab, users can view the technical issues related to SEO. There is an “Optimize Content” button that the users can click, redirecting to the content optimization page.
Step 17: In the performance tab, the total performance score is shown along with issues and passed checks. The issues related to performance are listed down below, where the user can click on the “Optimize Content” button to go to the content optimization page.
Step 18: The accessibility tab will display the total audit score along with issues and passed checks. There will be issues related to accessibility listed down for users to understand existing technical problems. Users can press on the “Optimize Content” button to go to the content optimization page.
Step 19: In the Best Practices section, users can view the total best practices score along with issues and passed checks. The issues related to the store are listed below and users can optimize the content by clicking on the “Optimize Content” button.
