
Step 1: Go to Shopify App Store
Step 2: Search Aero Volume Booster
Step 3: Install Aero Volume Booster in your Store
Step 4: Go to the theme customization menu and embed our app by enabling the toggle button and click on save button to install the app on the theme.

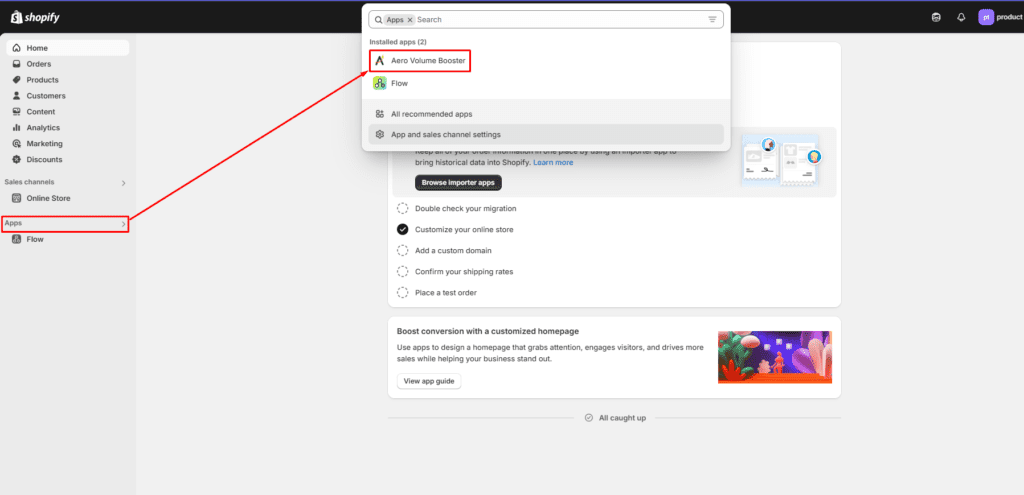
Step 5: Go to your Store click on Apps Option and select Aero Volume Booster app.
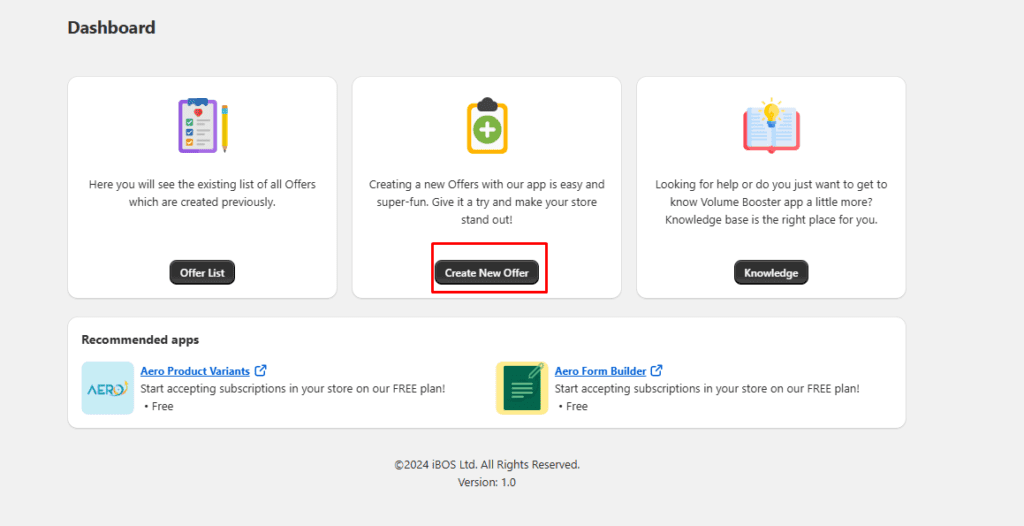
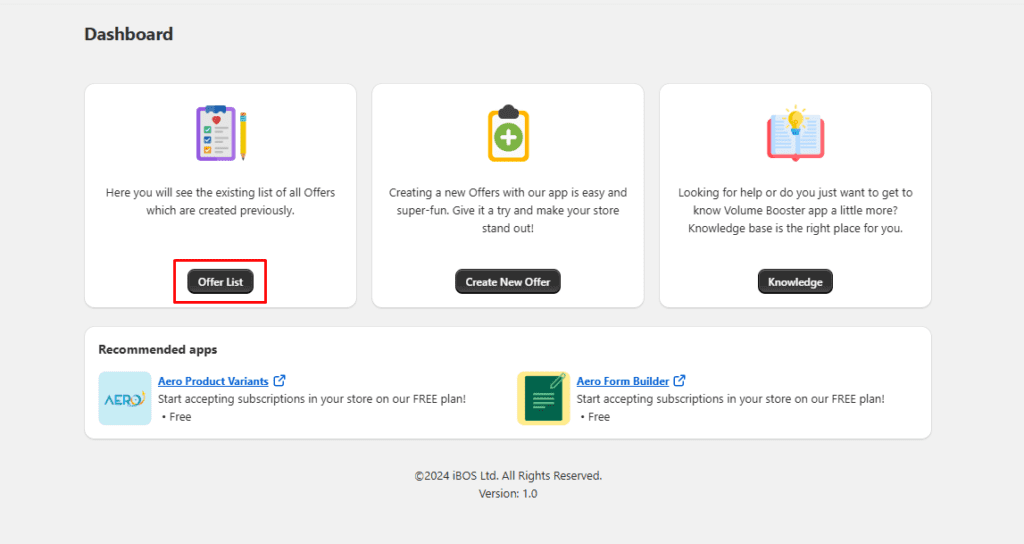
Step 6: To create a new Campaign go to Dashboard and select “Create New Offer”
Step 7: If you want Buy X Get Y Functionality, Select Buy X Get Y option.

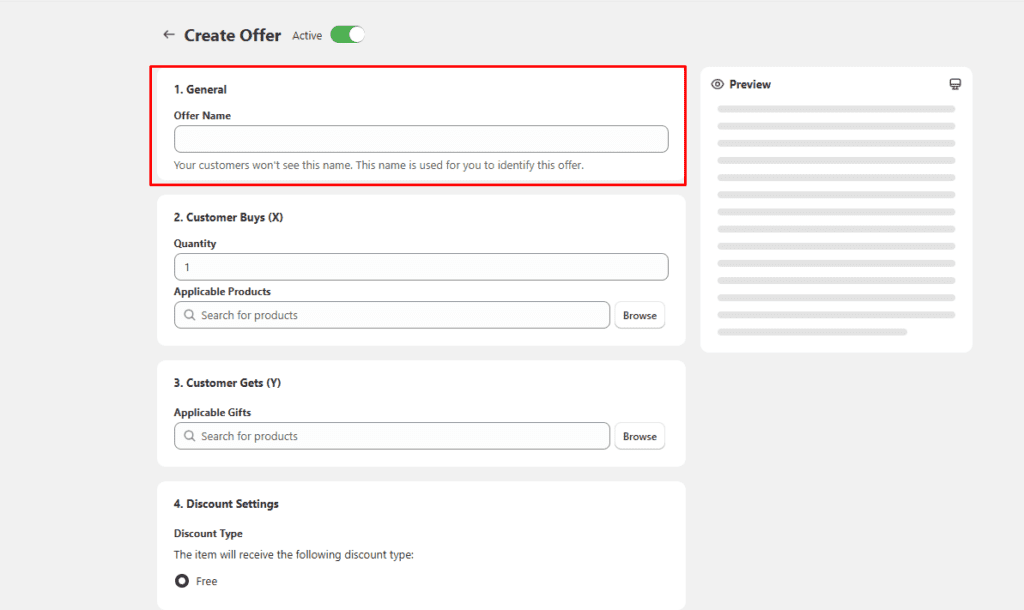
Step 8: Enter your Campaign name to track your offer on offer list table.You can not save your offer without input offer name.
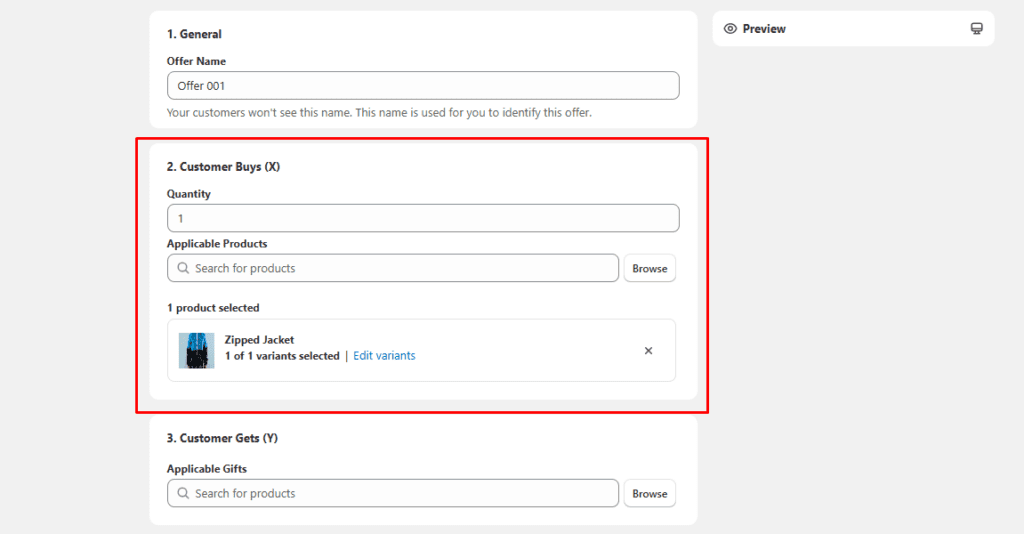
Step 9: Select ‘X’ Product by clicking on Browse button or search in the search bar to select under which product you set the offer. Offer can not be saved without this section.
Step 10: Select ‘Y’ Product by clicking on Browse button or search on the search bar to select which product you want to set for offer. Campaign can not be saved without this section.
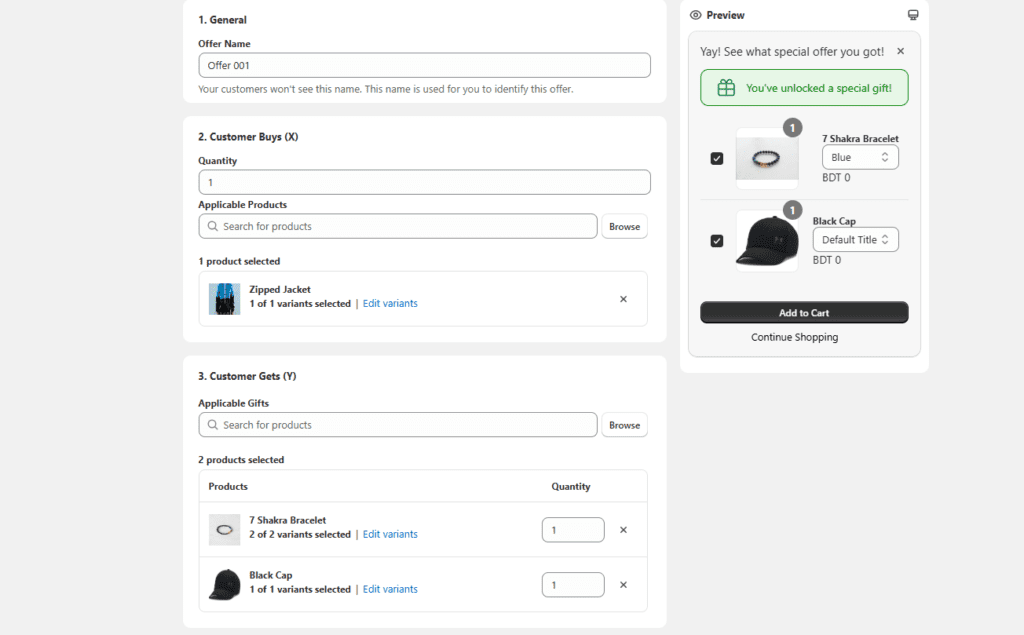
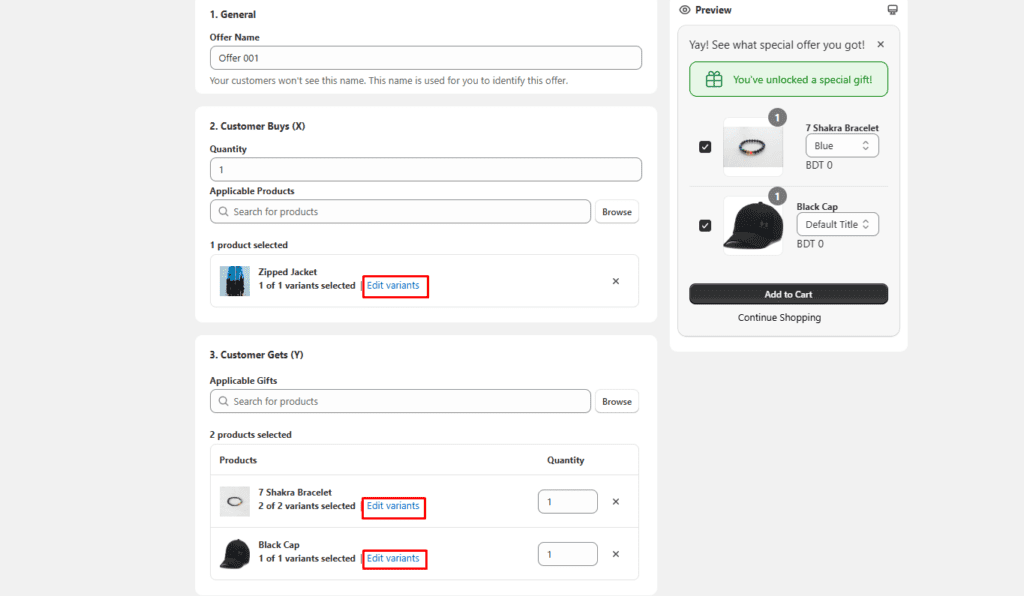
Step 11: Admin can also edit and set variant for the products.
Step 12: There is a Discount Setting option to set the discount type.

Step 13: Schedule option for set Start Date and End Date.

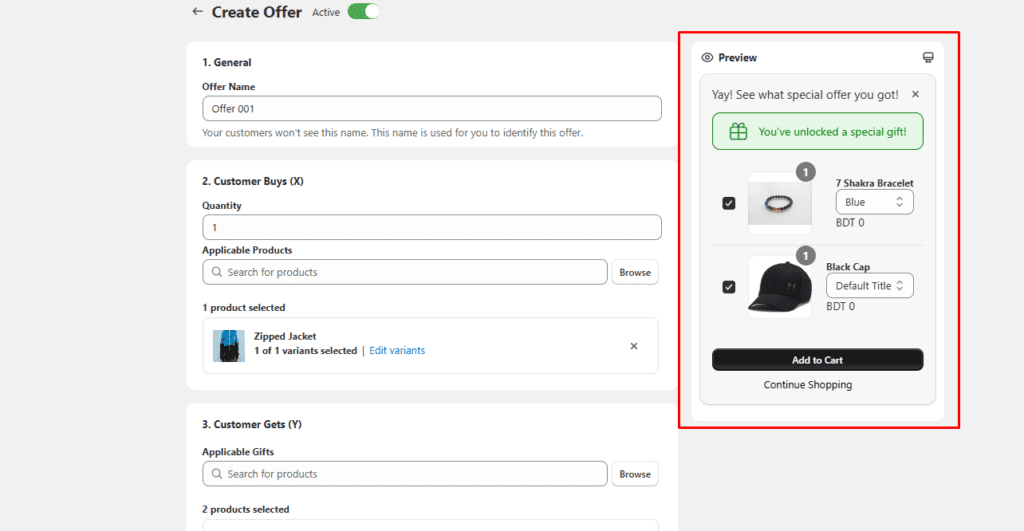
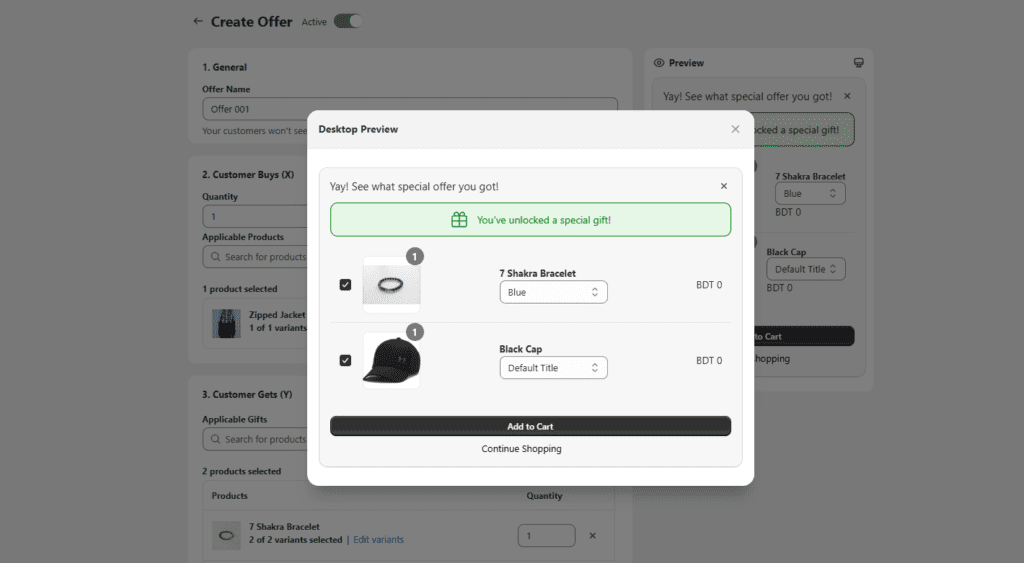
Step 14: There is a live preview option for desktop and mobile. The product will appear in preview after adding ‘Y’ product. And click on desktop icon to see desktop preview.
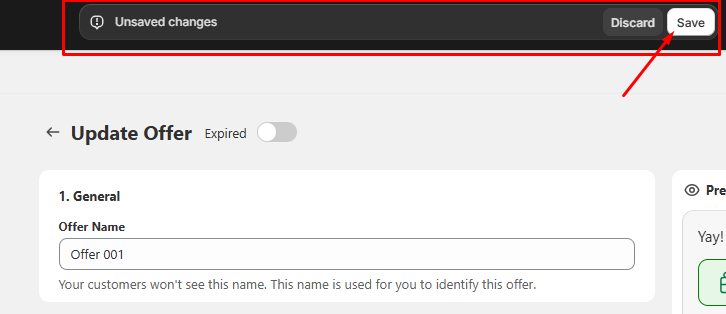
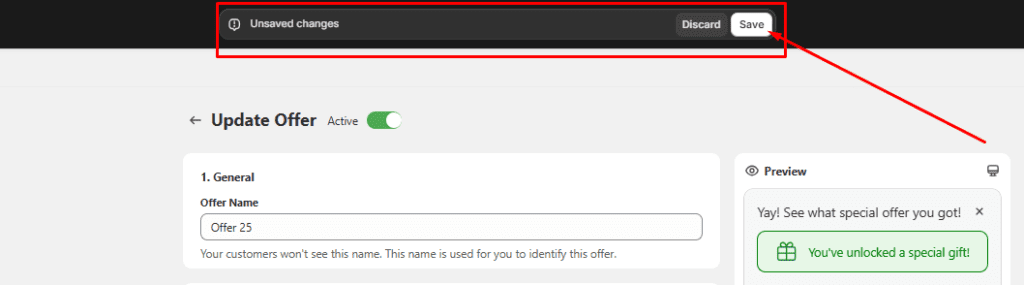
Step 15: After creating offer, click the Save button to activate it
Step 16: After creating your Campaign on admin panel your offer will appear as pop-up modal on your storefront.

Step 17: Mange your offer from Offer List page where you can edit and delete offer and change active status.

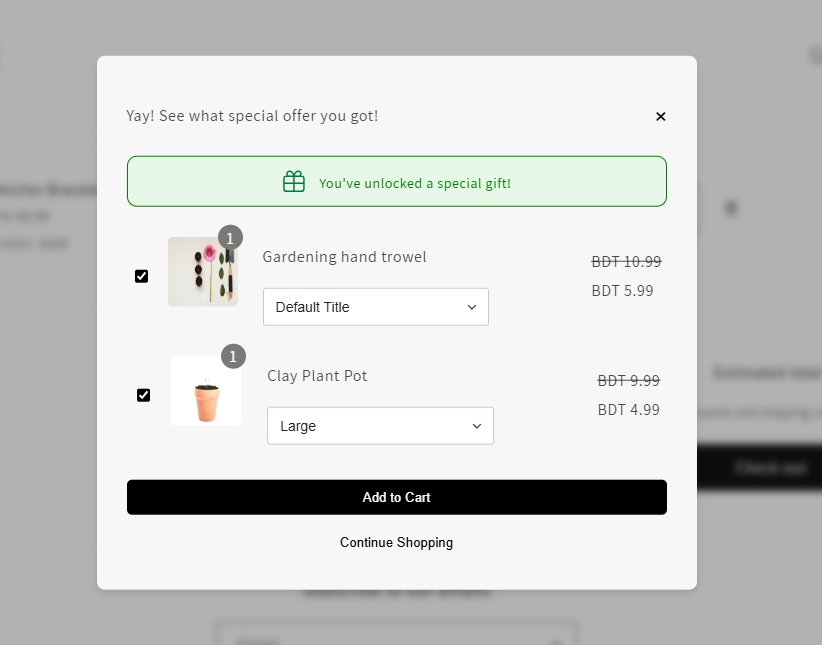
Step 18:To enable the “Gift With Cart Value” feature, select the Gift With Cart Value Purchase option.

Step 19: Enter your Campaign name to track your offer on offer list table. You can not save your offer without input offer name.

Step 20: The user can set a minimum value, and offers will be shown on only those products according to the minimum value.

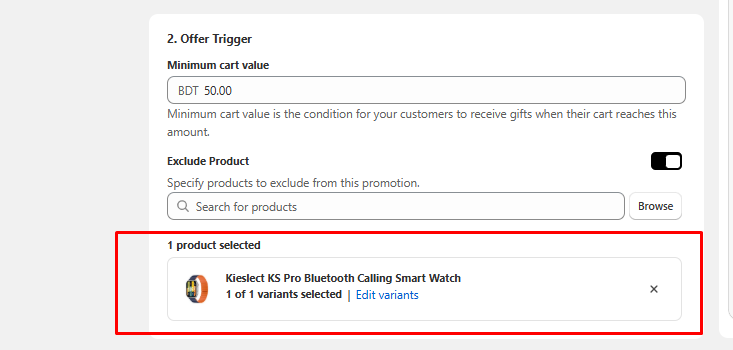
Step 21: You can exclude specific products from offers by enabling the “Exclude Product” option.
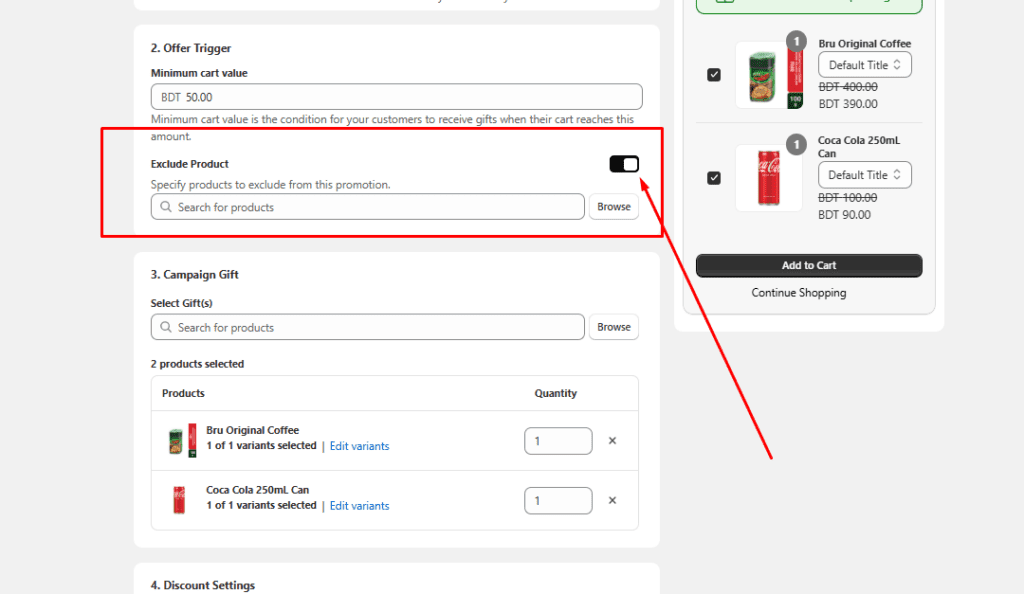
Step 22: You can select those exclude offer by clicking ‘Browse’ button. After that you have to select those exclude products.

Step 23: You can select gifts from the Campaign Gift section, which will be displayed on the storefront during the Add to Cart process when the minimum cart value requirement is met.

Step 24: You can also apply discounts to these products as Free, Percentage, or Fixed Amount from the Discount Settings section.

Step 25: You can set the offer schedule from the start date to the end date.

Step 26: After creating offer, click the Save button to activate it.
Step 27: Finally, on your storefront (the store you connected earlier), when you click “Add to Cart” for any product (only those with prices matching the minimum value you set earlier), the offer you configured will pop up at checkout when you click the cart button.
Step 28: If you want Volume Discount Functionality, Select Volume Discount option.

Step 29: First you have to set offer name. Your customers won’t see this name. This name is used for you to identify this offer.
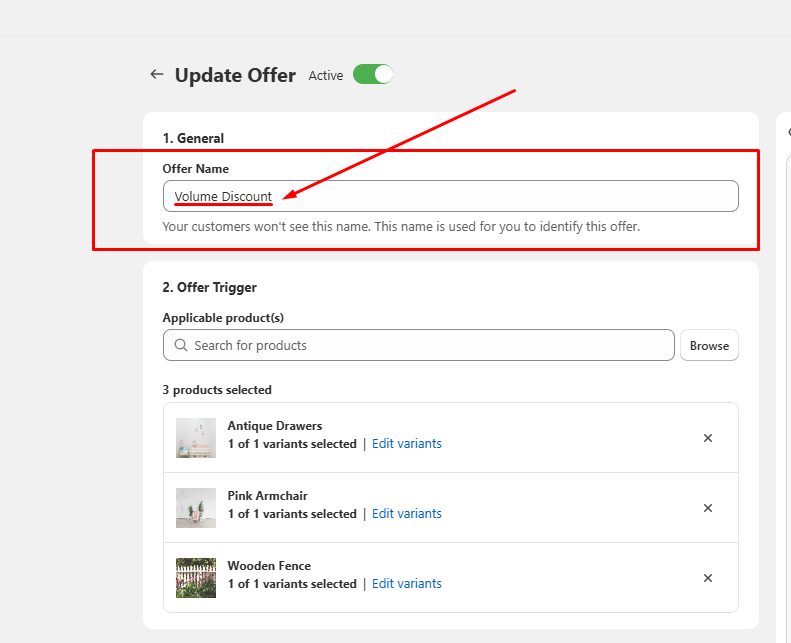
Step 30: You can choose your desired products from here to set offers.
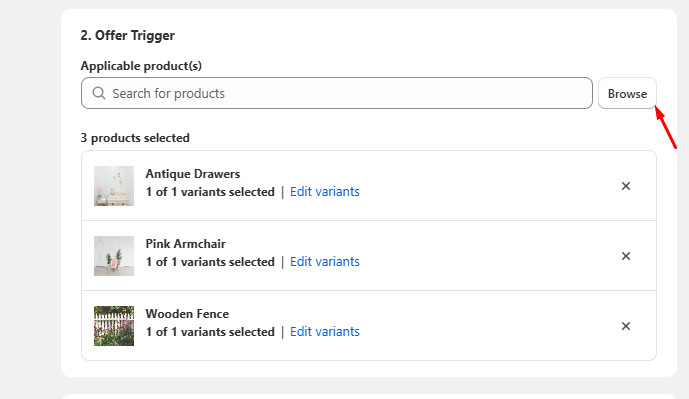
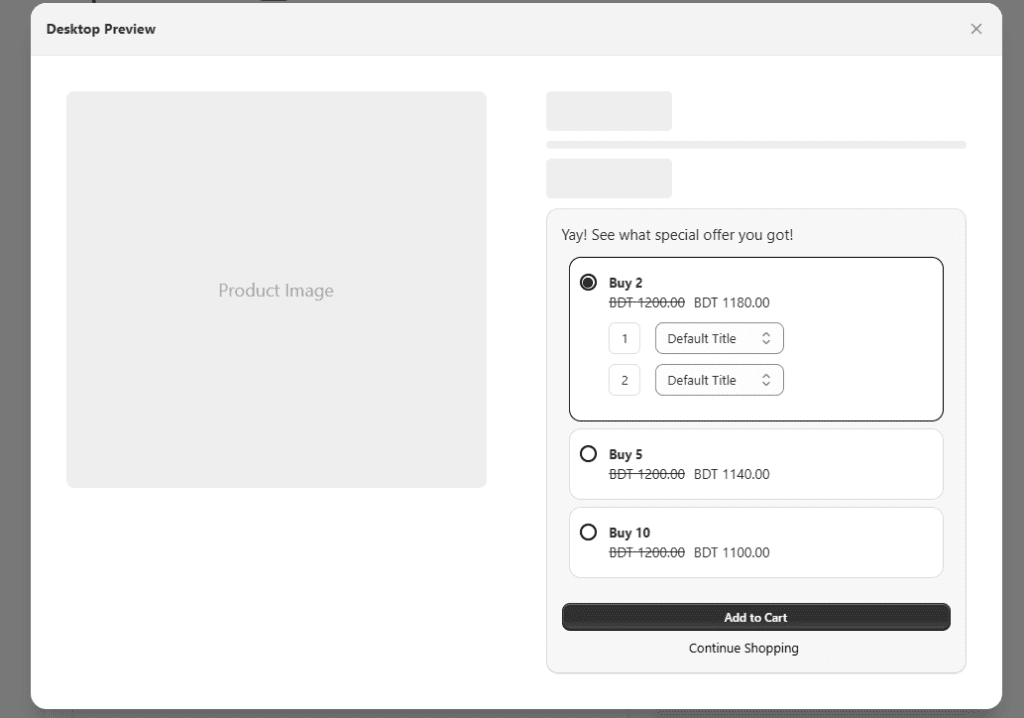
Step 31: You can set offers for products, specifying the discount amount based on the quantity of products purchased.

Step 32: And you can see the output of your offer as well. And click on desktop icon to see desktop preview.

Step 33: You can set the offer schedule from the start date to the end date.

Step 34: After creating offer, click the Save button to activate it.

Step 35: On your connected storefront, when you click “Add to Cart” and the product quantity matches the previously set amount, the configured offer will appear at checkout when you access the cart.

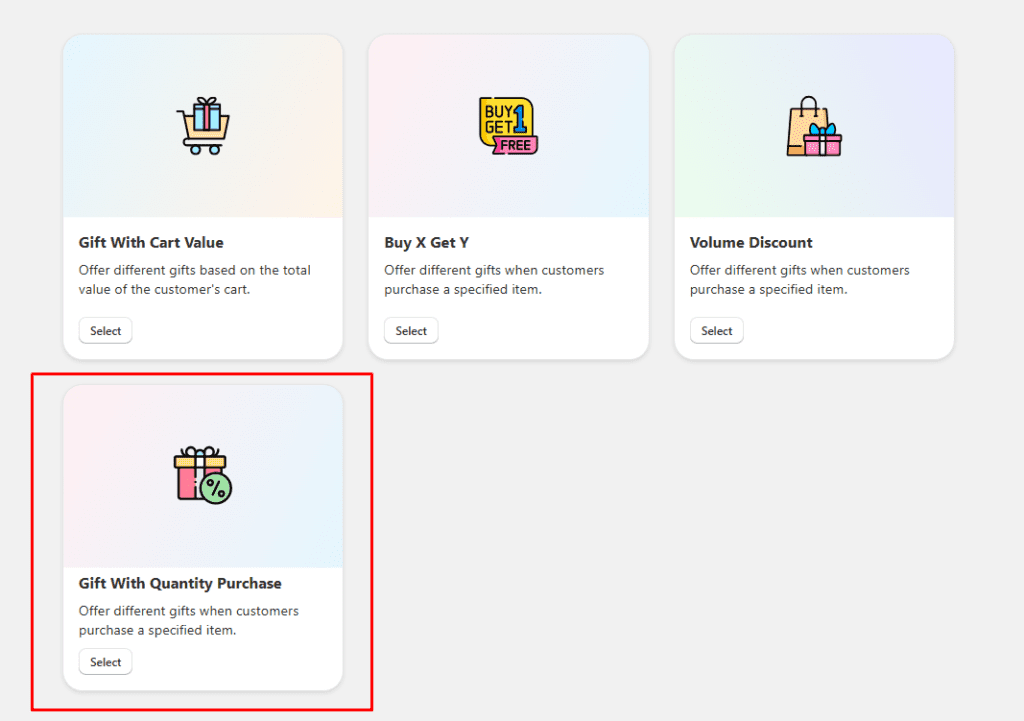
Step 36: To enable the “Gift with Quantity Purchase” feature, select the “Gift with Quantity Purchase” option.
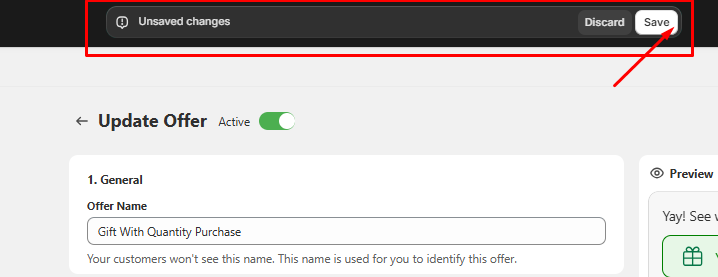
Step 37: First you have to set offer name. Your customers won’t see this name. This name is used for you to identify this offer.

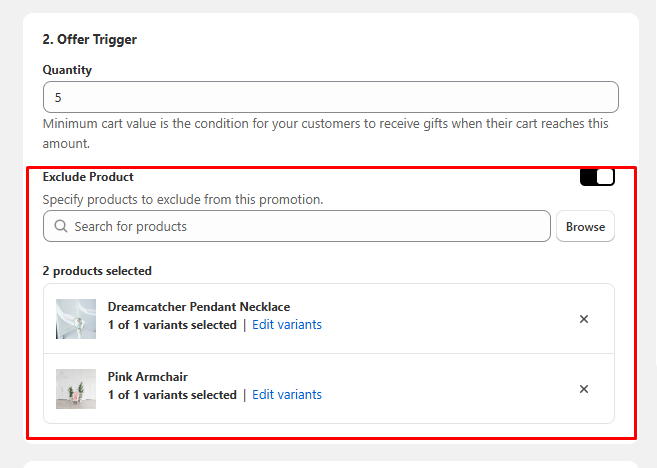
Step 38: You can set a minimum quantity value, which will determine when campaign gifts are activated.

Step 39: You can exclude specific products from offers by enabling the “Exclude Product” option.

Step 40: You can select Exclude Product by clicking Browse button. After that you have to select those exclude products.
Step 41: You can choose gifts and set quantity from the Campaign Gift section, which will appear when the minimum cart value matches the amount you set earlier.
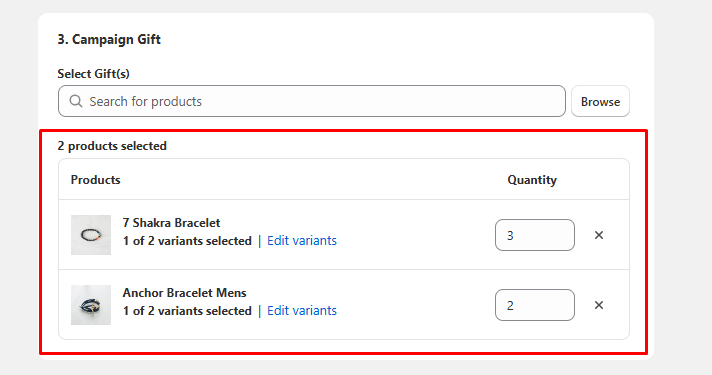
Step 42: You can view these items and their quantities in the admin panel for both mobile and desktop views.


Step 43: You can also apply discounts to these products as Free, Percentage, or Fixed Amount from the Discount Settings section.

Step 44: You can set the offer schedule from the start date to the end date.

Step 45: After creating offer, click the Save button to activate it.
Step 46: Finally, on your storefront (the store you connected earlier), when you click “Add to Cart” for products that match the quantity set in the Offer Trigger section, the configured offer will pop up at checkout when you click the cart button.


AeroApps offers exciting products to help you start, run, and grow your Shopify store successfully.
contact@aeroapps.io
Quick Links
Office Location
USA Office
945, Taraval St #1083, San Francisco, CA 94116, USA
Bangladesh Office
© 2025 AeroApps Ltd. All rights reserved.